 Now that you have a WDS environment that can complete some basic task sequences and deploy images, to make this much more useful we need to create a reference image that has (some or all of) our Workspace ONE UEM Windows 10 apps in it. We also want it to automatially enrol into Workspace ONE UEM for the end users.
Creating Your Image
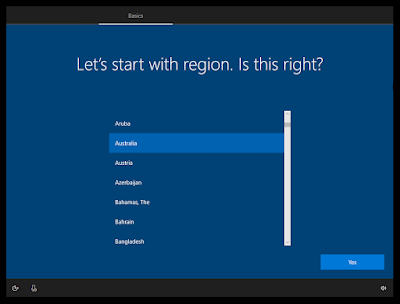
The first thing we need to do is install a fresh Windows 10 installation. For me, I created one in my vSphere environment but you could also use VMware Workstation, VMware Fusion or even a Physical Machine (if you really needed to). It doesn’t need to be anything special as we’re just using it to capture the required settings etc. Install Windows 10 (whichever release and edition that suits your needs) but when it boots for the first time, you need to boot into Audit Mode.
When your VM/Machine gets to the OOBE process like below, you can enter into Audit Mode by doing the following:
- Fusion: SHIFT+FN+CONTROL+F3
- Workstation: CTRL+SHIFT+F3 or CTRL+SHIFT+FN+F3 (on some laptops)

This will take you into Windows as “Administrator” and allow you to create changes before sysprepping the image ready for mass deployment.
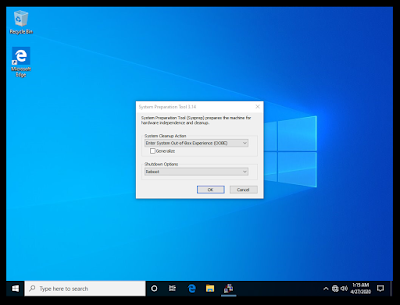
You should cancel here on the Sysprep window. Go into Settings and then Windows Updates and make sure your image is up to date.
While that is happening, log in to your Workspace ONE UEM environment Admin Console.
We need go to Devices –> Lifecycle –> Staging –> Windows..

In here we can create a Provisioning Package (PPKG) and also an unattend.xml file for Sysprep.
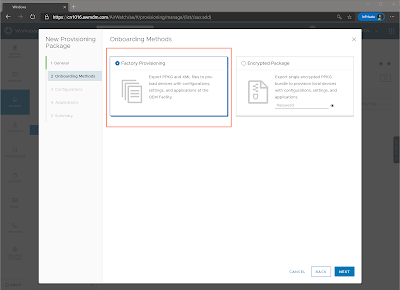
In this next page we get to configure how we want the image sysprepped and if it will join Active Directory, Azure AD or be a Workgroup build.
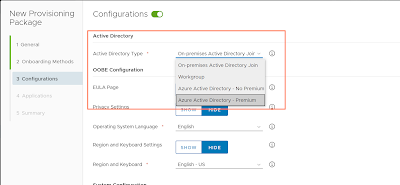
You also configure everything else that would normally go into a Sysprep file here too. Change all the settings that relate to your Organisation. You also need to see your Enrollment Settings at the bottom here too.

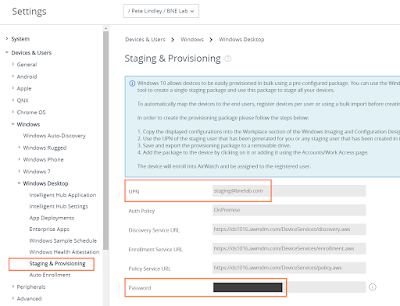
Note: The staging account details can be found at Settings –> Devices & Users –> Window Desktop –> Staging & Provisioning
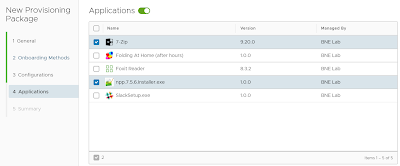
Once we’ve filled that out, we can select app which Apps from Workspace ONE UEM we can to be pre-installed. You don’t need to install anything here but these will be available as soon as the machine builds. Anything else that is assigned to the User/Device will download once enrolled as normal.
Continue through the Summary Page and then select Save & Export.

Now lets go back to our reference machine, it should now be updated.
You need to download the Workspace ONE Provisioning Tool for Windows and place it in the same location as your Provisioning Files above: https://resources.workspaceone.com/view/vb2sfw388q4h2kyqdw3k/en
Unzip the Provisioning Tool and open VMwareWS1ProvisioningTool.exe and select the .ppkg file and the unattend.xml file that you downloaded from the Workspace ONE UEM Console.
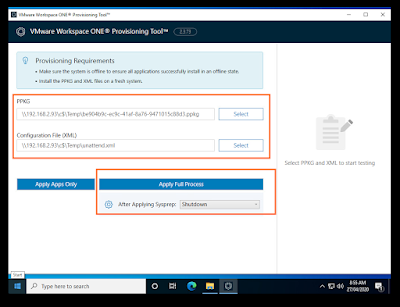
IMPORTANT: Make sure you select “Shutdown” after applying sysprep and that you press “Apply Full Process”. This installs the apps in the ppkg as well as applying sysprep.
Leave your image as is for now.
We need to go back to our Windows Deployment Server.
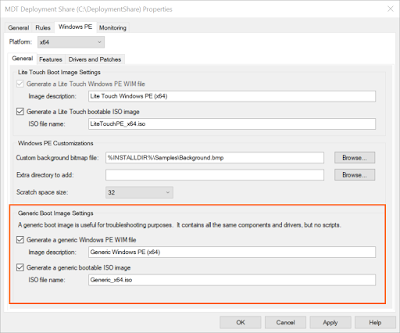
Right click on your Deployment Share and go to Properties, under the Windows PE tab (select x86 and/or x64) and enable “Create Generic WinPE Boot Images“
Like before, our boot images are in your DeploymentShare under the boot folder.
You need to boot your reference image with this generic boot.iso into a WinPE environment. Make sure you don’t boot to Windows as it will start the OOBE process.
Once you’ve booted with this generic boot disk, you will be at a command prompt like below.
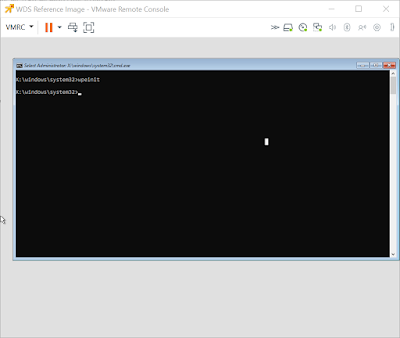
Here you will need to manually mount your Deployment Share on your WDS Server to access the tools we need, and to save the captured WIM file.
I want to map a network drive to W: so I used:
net use W: \servernameDeploymentShare$ /user:DOMAINAdministrator
The command I want to run is ImageX so I run:
W:Toolsx64imagex.exe /capture C: W:Capturesreferenceimage.wim "My Reference Image"
This will capture your Reference Image to WIM format and save it on your Deployment Share.
FYI: There is a ‘Sysprep and Capture’ task sequence that you can add in the Deployment Workbench, however it has multiple scripts that want to Sysprep our image again. When we let WDS/MDT sysprep our image again it removes any of the staging of the Workspace ONE components and doesn’t allow enrollment. Even overriding Sysprep with our unattend.xml file doesn’t seem to fix it. I will work on a cleaner way of capturing in the future.
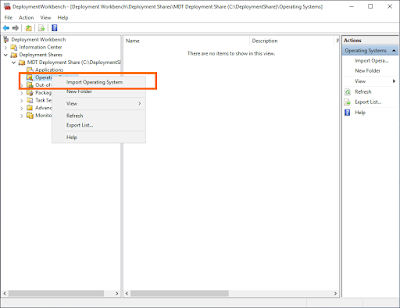
Back on your WDS Server, we need to import the Captured Image file. In your Deployment Toolkit, right click on Operating Systems and “Import Operating System”
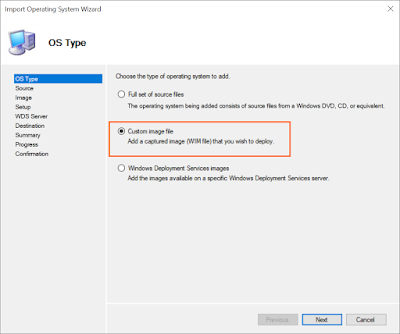
Select the “captured” WIM file from where you saved it to.
The last thing we need to do is create a Custom Task Sequence so it deploys to our machines.
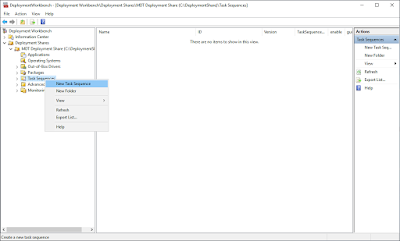
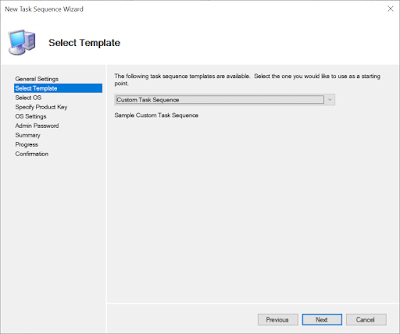
Click through all the Nexts and Save. Now we need to edit the Task Sequence (Double Click on it, or right click then Properties)
Go to the Task Sequence tab and delete everything in there.
Now, Add the following:
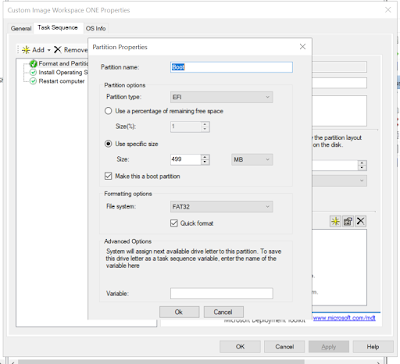
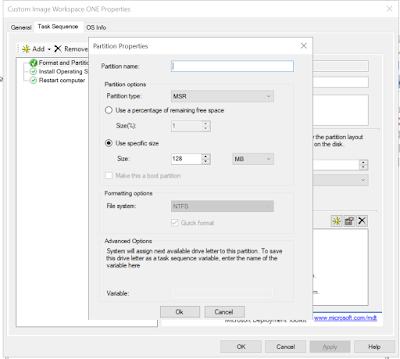
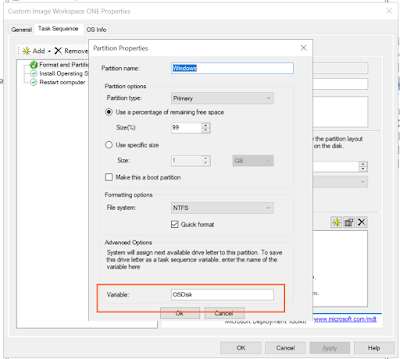
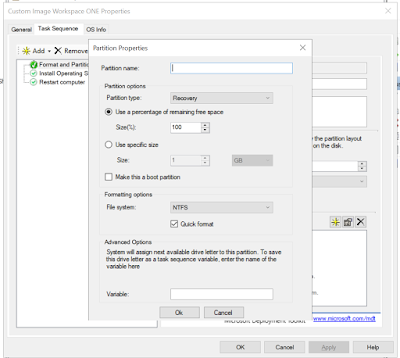
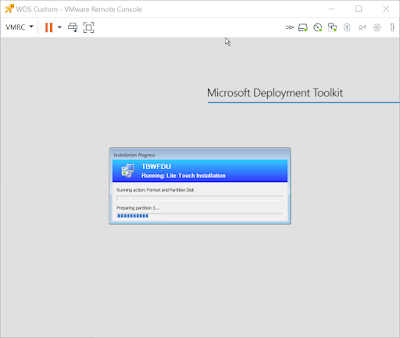
Click Add, then Disks, Format and Partition Disk. You need to Click New in the “Volume” area. (note: this picture below is what it should look like after adding all partitions).
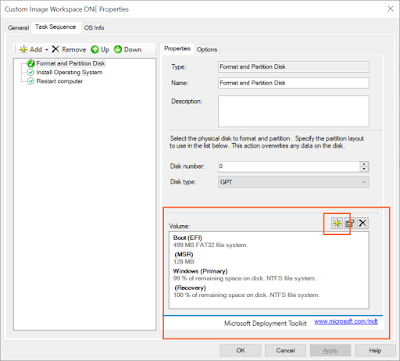
Add the 4 partitions exactly as below.
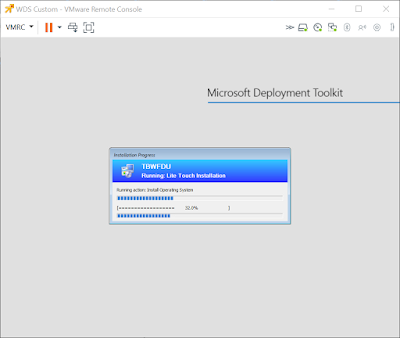
Now we need to tell it to install the OS.
Go to Add, Images, then Install Operating System and select your Captured WIM file
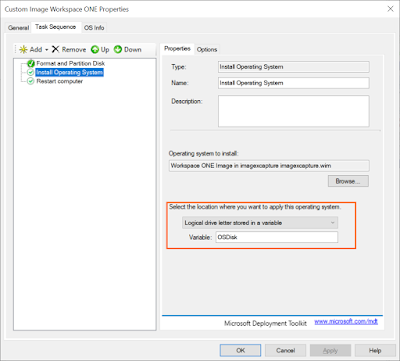
Click Browse to select the OS, and note the “Select the location” area where you specify the Variable we set above.
After the OS deploys, we want the machine to restart automatically, so go to Add, General, then Restart Computer.
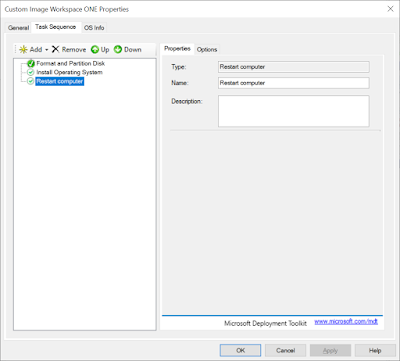
Save your new task sequence, and its ready to deploy the image.
Boot from PXE Network Boot like before and will now see a new option in your available task sequences.

Then deploy our captured image
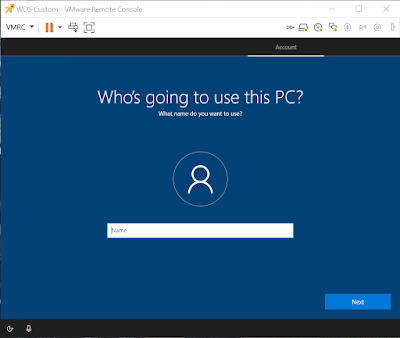
After the reboot, it will take us through the Windows OOBE using the settings you configured in your Workspace ONE Provisioning configuration. I selected “Workgroup” so I get asked to create a local account.
The PC will have enrolled as the staging account we used, and will have started to install any Apps and Profiles assigned to “All Devices” in Workspace ONE.
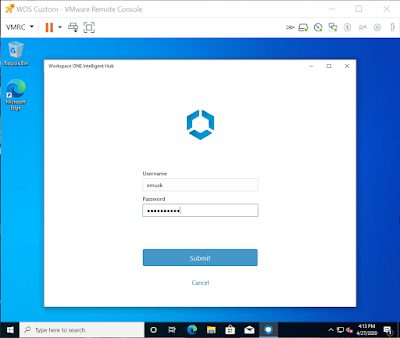
Depending which enrollment type you selected (Active Directtory, Azure AD or Workgroup) your device will reassign in Workspace ONE UEM to the next logged in user, or the user will see an Intelligent Hub login screen like below.
The Workspace ONE App will also now download and will automatically assign itself to the registered user above.
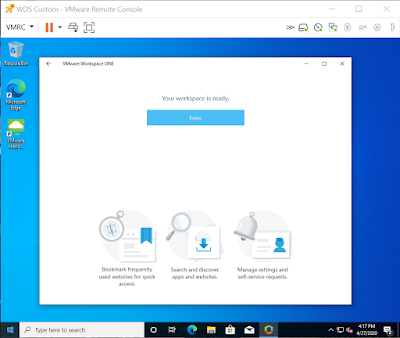
All done!
Over the last two articles, you’ve successfully built a Network Boot Windows Deployment Server as well as created a Reference Image that automatically enrolls into Workspace ONE. Success!


Leave a Reply
You must be logged in to post a comment.