 A few days ago I mentioned in an article with the shocking news that not everyone had Active
Directory for their user accounts. I talked about Just-In-Time Provisioning into Identity Manager
using Google Cloud Identity as the IDP. Now, this is great for getting user accounts into VMware Identity Manager but without an AD/LDAP directory to sync to our Enterprise Systems Connector with Workspace ONE UEM doesn’t have a way to get user accounts automatically.
Well that’s not technically true.
A while ago myself and a colleague had this exact scenario – a customer only used Google Cloud Directory and needed to get accounts into Identity Manager and Workspace ONE UEM. What we discovered was that we were able to also JIT user accounts into Workspace ONE UEM during enrollment. This meant we didn’t have to manually create accounts in Identity Manager or Workspace ONE UEM because we couldn’t use the Enterprise Systems Connector due to not having an LDAP source.
Here’s how we did it.
Because JIT works by using the SAML assertion to create a user account on the fly, we need to enable SAML authentication using Identity Manager on Workspace ONE UEM. If you’re piecing the steps together at home, this means that we first need to get the accounts into Identity Manager before we can authenticate using SAML into Workspace ONE. Make sense?
The steps required to get this whole shebang working are:
- A configured Google Cloud Directory
- Add Google Cloud Directory as a 3rd Party IDP in Identity Manager
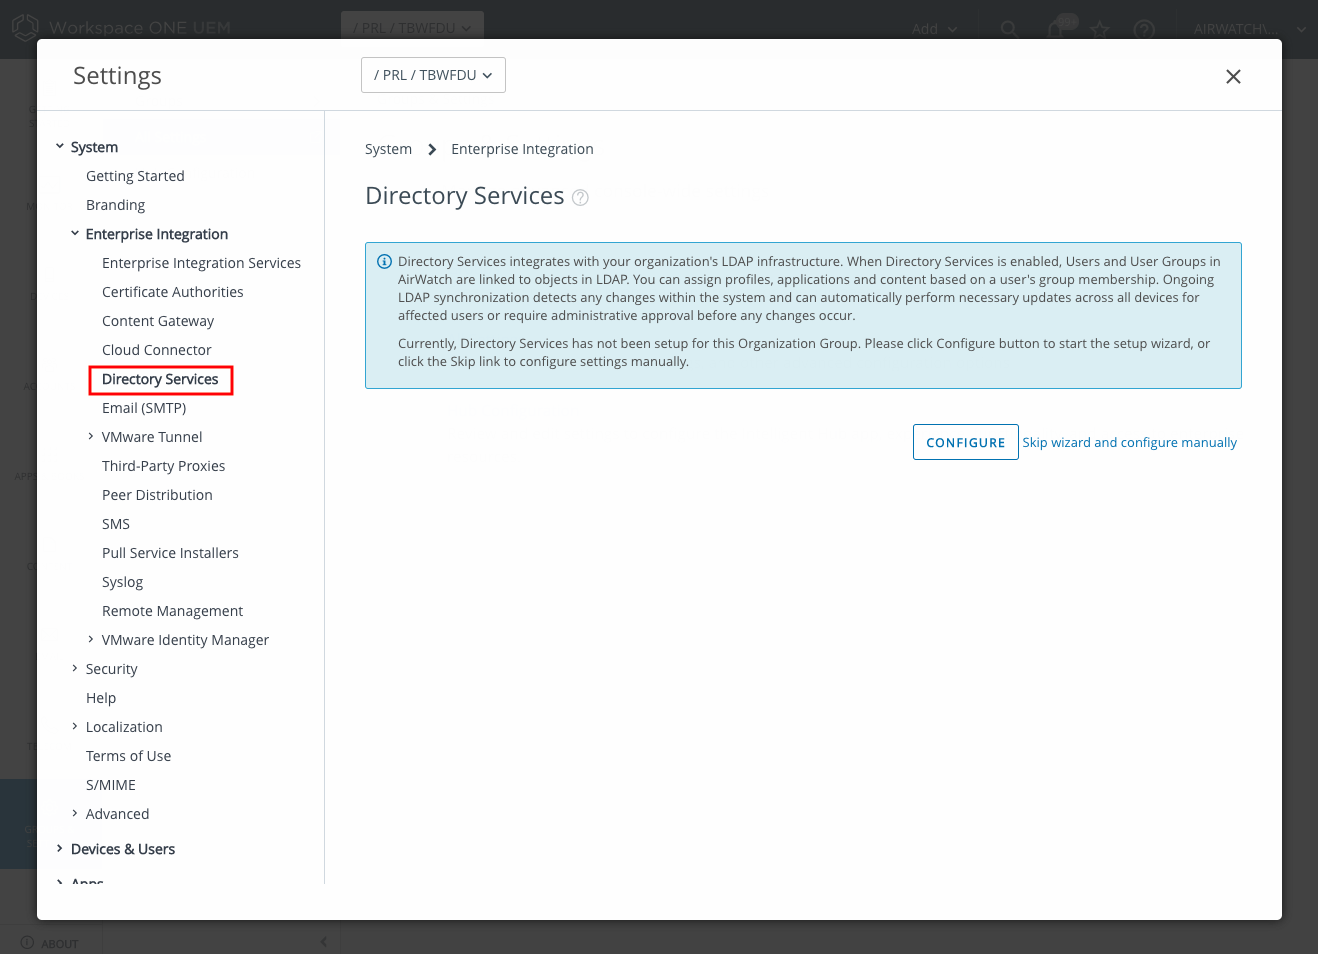
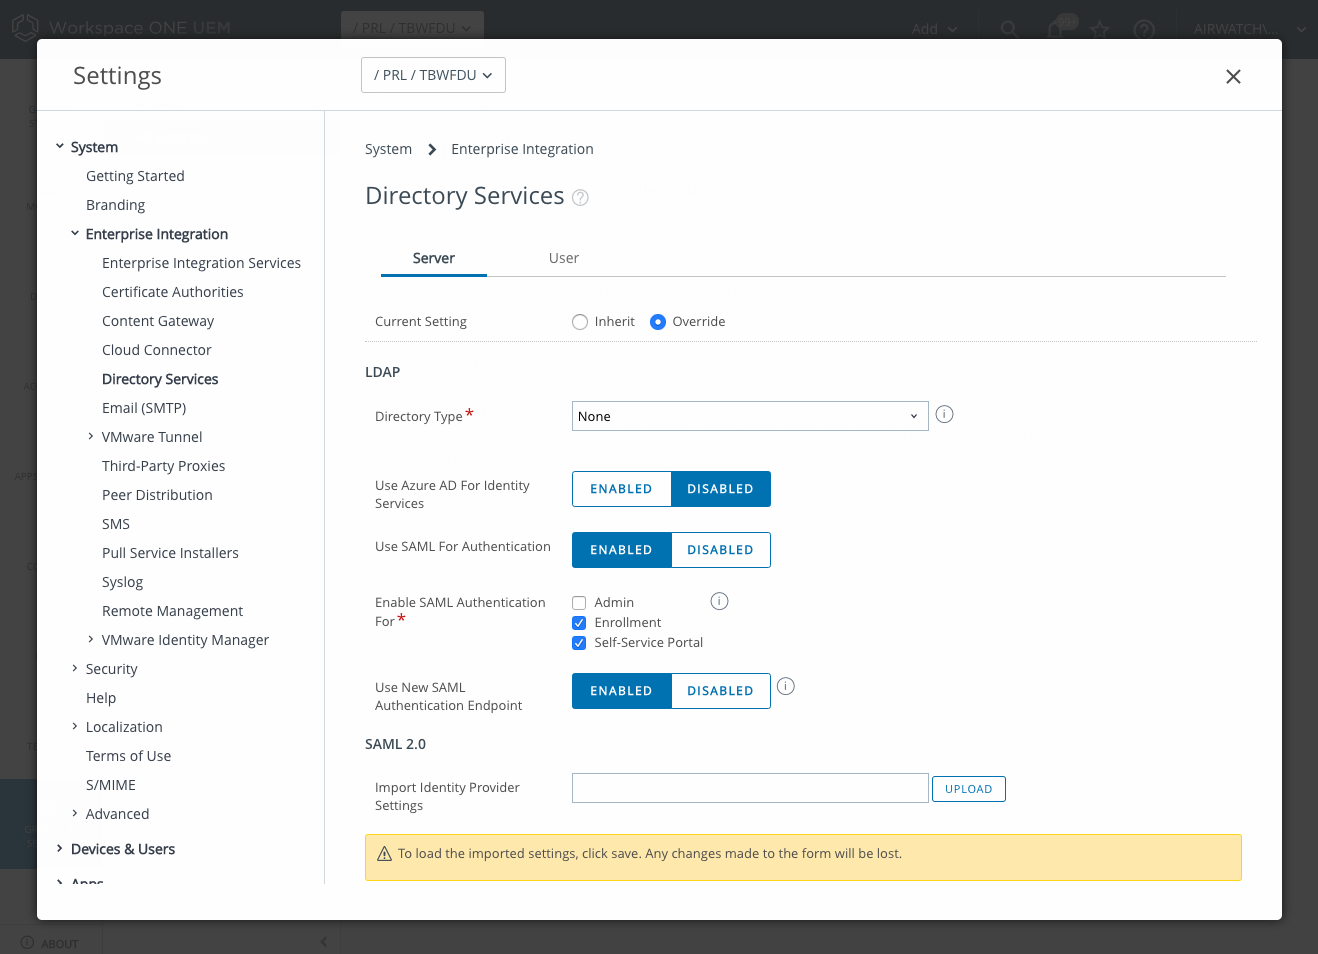
- Configure SAML authentication in Workspace ONE UEM
- Sit back and stroke your beard because this whole process is pretty cool.
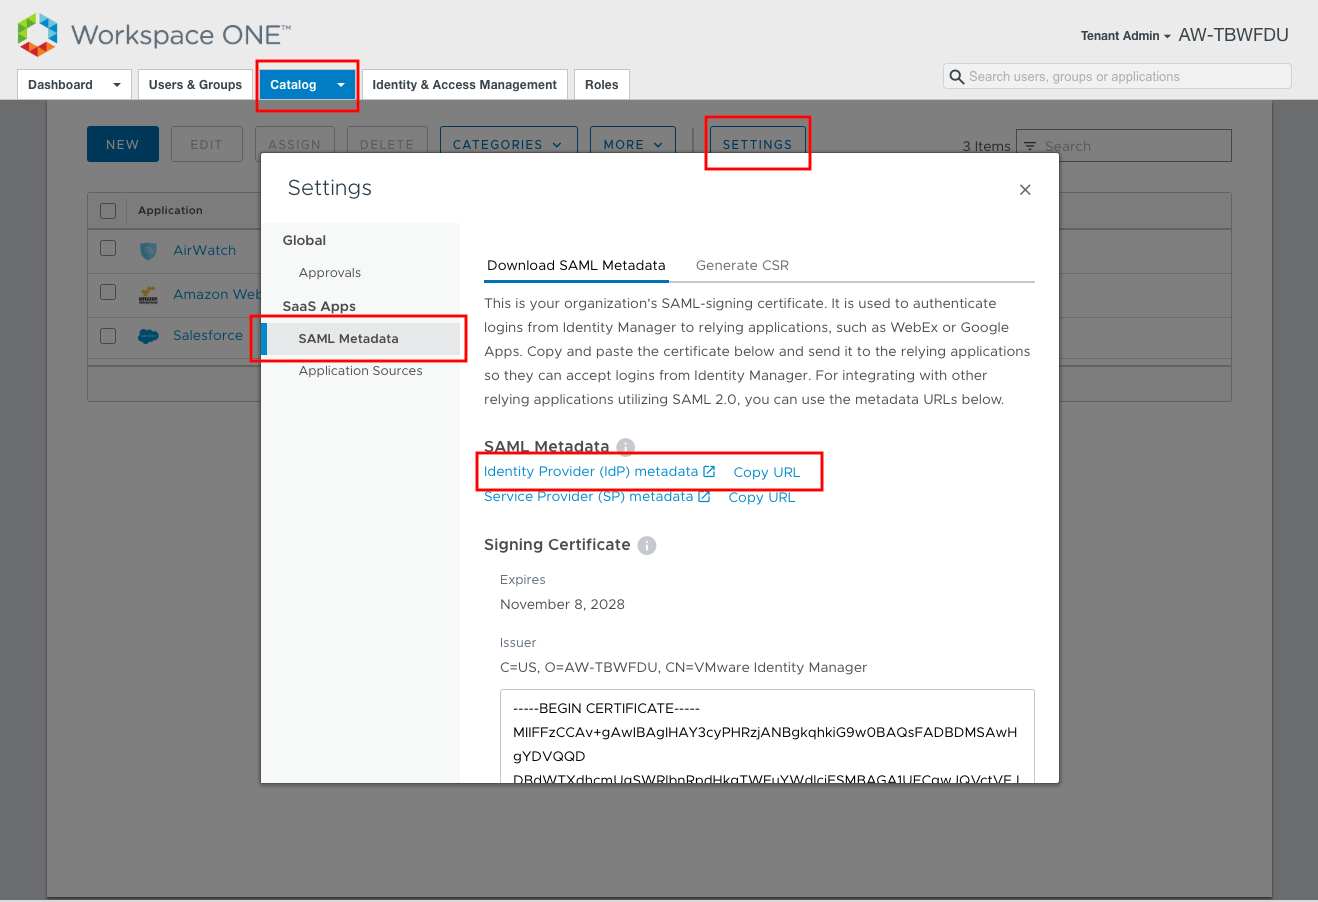
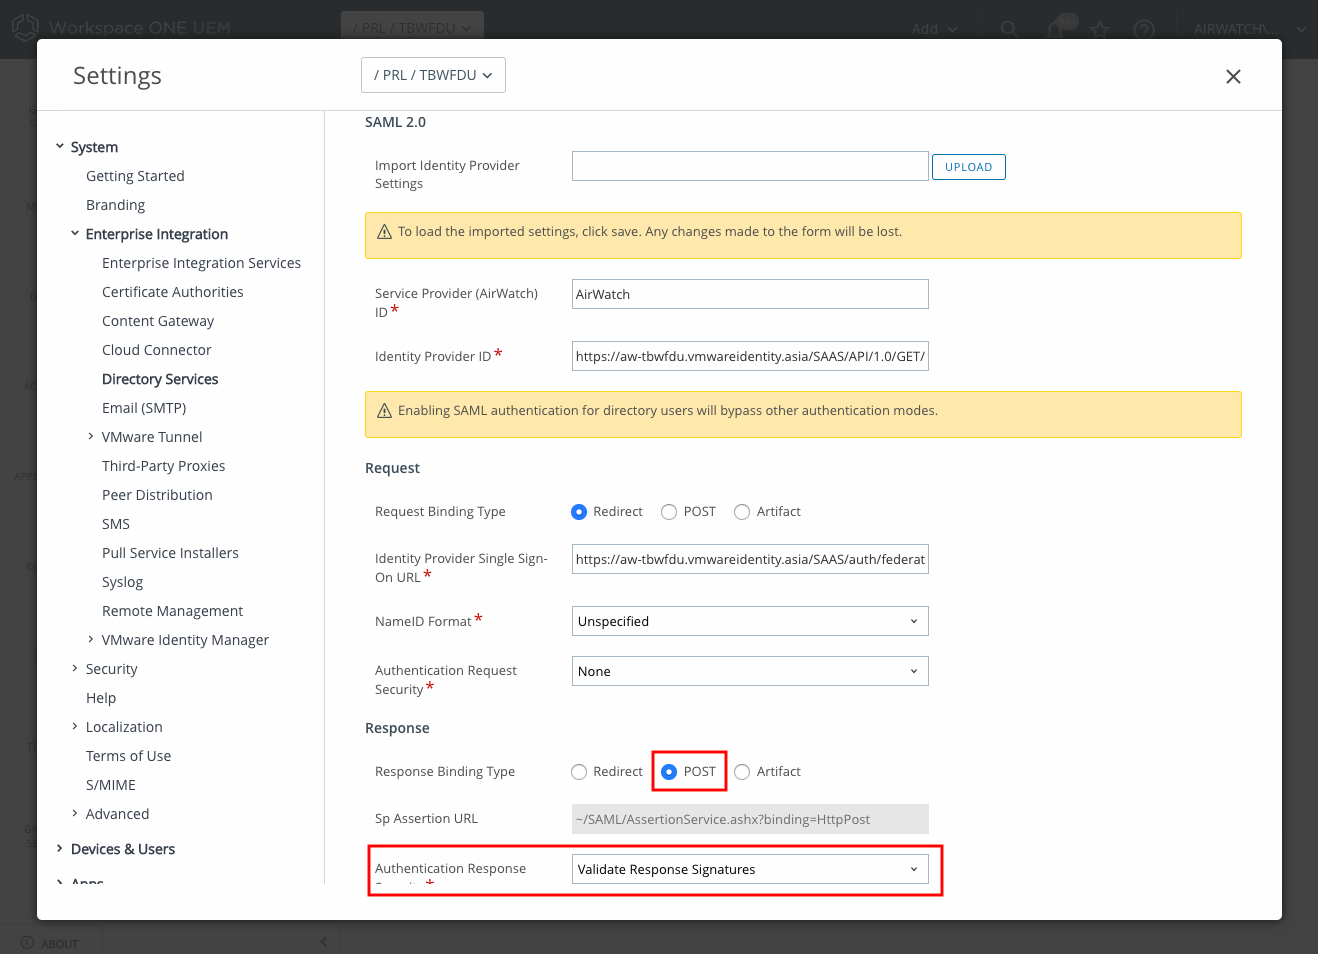
That’s pretty much it from a Workspace ONE UEM space. The certificate is contained in the idp.xml which you’ll see if you scroll down. Make sure you save the configuration.
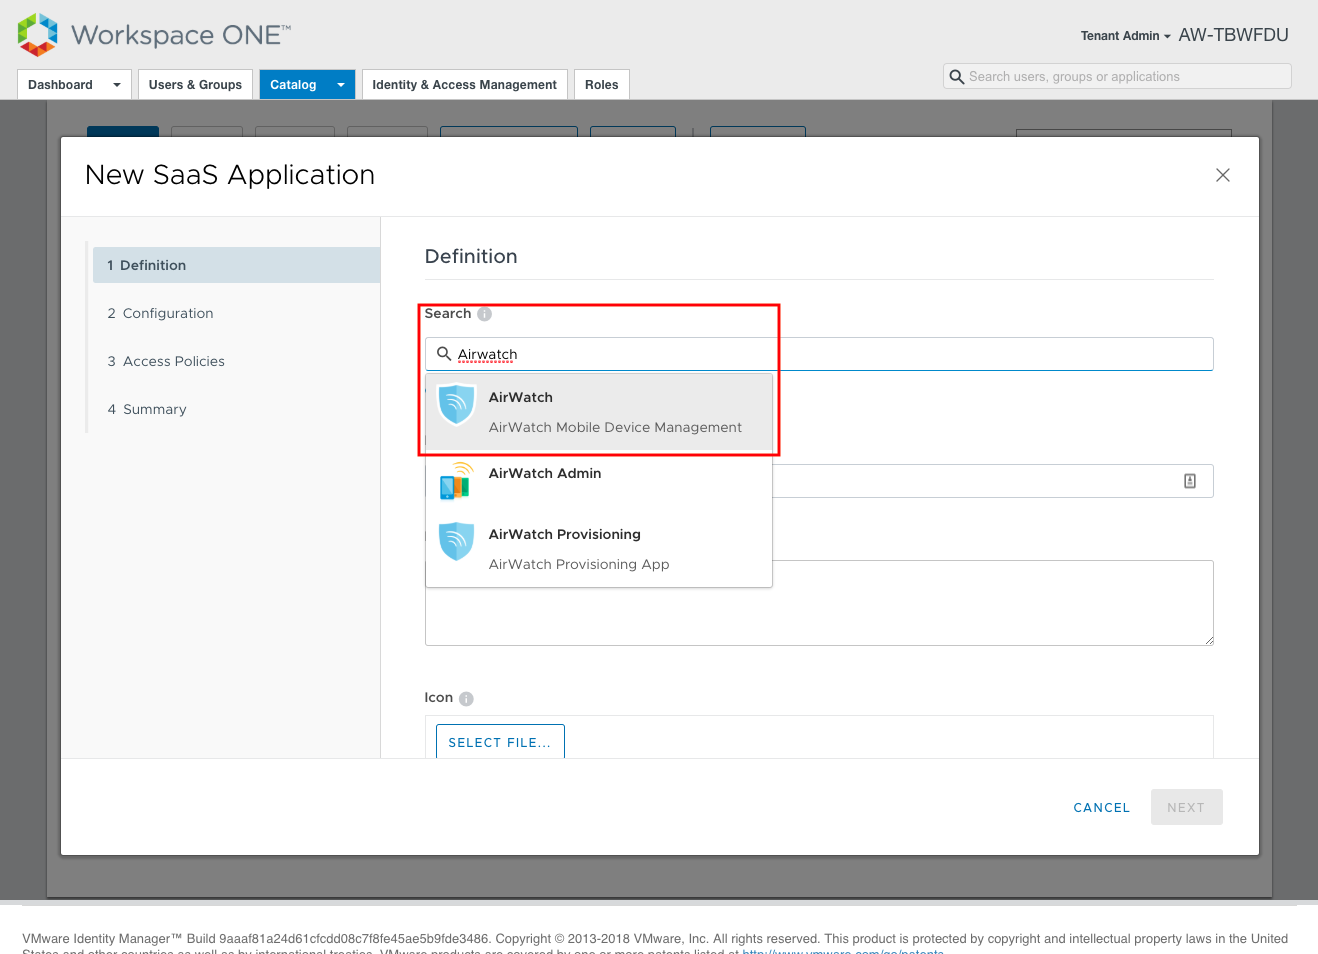
Now we need to add the AirWatch Application to our Identity Manager tenant.
Go to the Identity Manager Admin Portal, go to the Catalog and make sure you’re on the Web Apps page. Select ‘New’ and search for Airwatch.

You should assign it to the default_access_policy_set and assign it to ALL USERS (and automatic), and we’re done!


Leave a Reply
You must be logged in to post a comment.