
Creating and managing the lifecycle of user accounts for users outside your organisation painful. Whether they are for contractors or external vendors, the time in creating these resetting passwords and then deprovisioning them is very time consuming – let alone the security implications if the accounts aren’t removed.
A little while ago I was introduced to Azure AD Guest Accounts by a colleague. Guest Accounts are part of the Azure Active Directory Business to Business (B2B) capability where you can invite users from another Organisation’s Azure Active Directory to have access to resources in yours. This means that if you have a Cloud Application federated with your Azure Tenant, you can simply invite their account and once they accept they can log in with their existing credentials and gain access.
This sounded great. But what I realised was that we were able to leverage this for using Guest Accounts in VMware Identity Manager. When using Azure Active Directory as a 3rd Party IDP in Identity Manager, you can invite a user to your Directory and they can log into Identity Manager and access the portal and any SaaS Applications you assign. You don’t need to manage their account – if they forget their password its done at their Company’s end, and you can even enforce additional Multifactor Authentication.
The requirements for Guest Accounts in Identity Manager are:
- Your ‘Organisation’ must be using Azure Active Directory (doesn’t require Premium).
- The ‘Guest’ account you are inviting must be an Azure AD account from another directory or be a Microsoft Account.
- The ‘Service’ you’re entitling the Guest User to must have an account with a valid SAML attribute/NameID format. You can also use JIT to provision accounts into this service as well.
- You need to have configured Azure Active Directory as a 3rd Party IDP in Identity Manager.
Let’s go through how this all fits together.
When I originally wrote the
Azure AD integration article, my Identity Manager environment was syncing from a common On-Premises AD that was also synchronised with Azure AD. In this scenario, the Guest Accounts don’t exist in Identity Manager yet.
We just need enable and configure a JIT directory on the Azure AD IDP in Identity Manager and configure Azure AD to pass enough user attributes in the SAML assertion to create an account as the guest user signs in.
Go to the admin portal of your Identity Manager tenant and then locate your Azure AD Identity Provider you have already created.
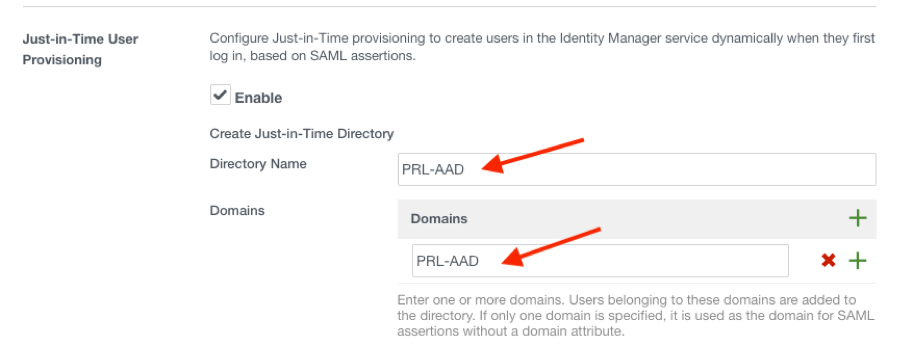
Scroll down until you find ‘Just-in-Time User Provisioning, select Enable and fill in both the Directory Name and the Domains fields. It doesn’t matter what its called for this situation. Click Save.
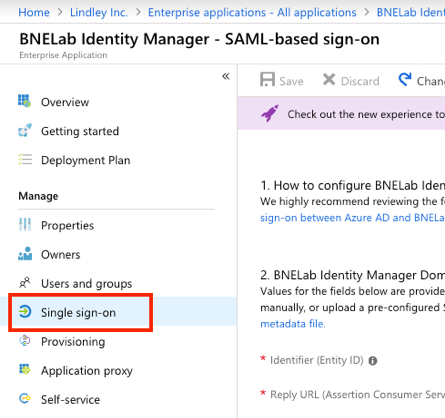
Now go back to the Azure AD admin portal, and go to the ‘Identity Manager’ SAML App you have already created Enterprise Applications and go to ‘Single Sign On’
We now need to look for the ‘User Attributes’ section to adjust this to satisfy the JIT user creation requirements. Select ‘View and Edit all other user attributes’ and set the attributes to match those below.
Note: Yes this seems weird but remember Azure AD isn’t a real Active Directory and does not have a full list of user attributes. Identity Manager needs these attributes to have valid values at a minimum in order to successfully create the account using JIT.
Azure AD does not (or at least I couldn’t find them with Powershell) valid user attributes for firstName, lastName etc. so by using user.mail it’s a value that 100% exists.
Now we can press Save here in Azure and invite our Guest Users.
The last thing we need to ensure is that our Guest Accounts are entitled to use the Identity Manager ‘Enterprise Application’ in Azure Active Directory.
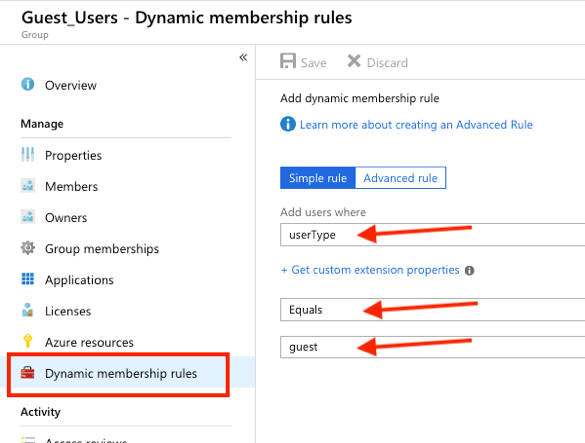
The easiest way to entitle this for our scenario is to create a new Group in Azure Active Directory and set the Membership type to be ‘Dynamic User’
Go to Azure Active Directory -> Groups then New Group and select Security, fill in a name and set it to be Dynamic User.
Select Add dynamic query and go to Dynamic membership rules. Leave it as Simple rule and set the rule like below:
Because we don’t want to have to add a user every time to use this Application, we can just add this dynamic group and every guest user will automatically entitled. This isn’t mandatory, it is just an easy way to enable Guest Users to authentication to Identity Manager.
Inviting Users
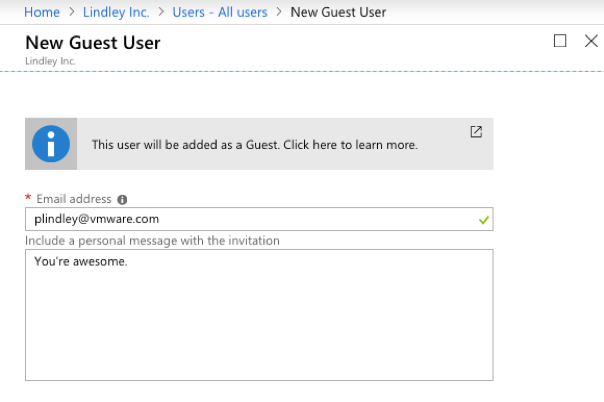
Inviting users is a straight forward process. You only need to enter their email and then they will receive an invitation email that they need to accept to finalise the account creation.
Go to your Azure AD admin portal and click on ‘Manage Users’ then ‘New Guest User’
Then just fill out the form like below and they will receive an invitation
First Time logging in as a ‘Guest Account’ Process
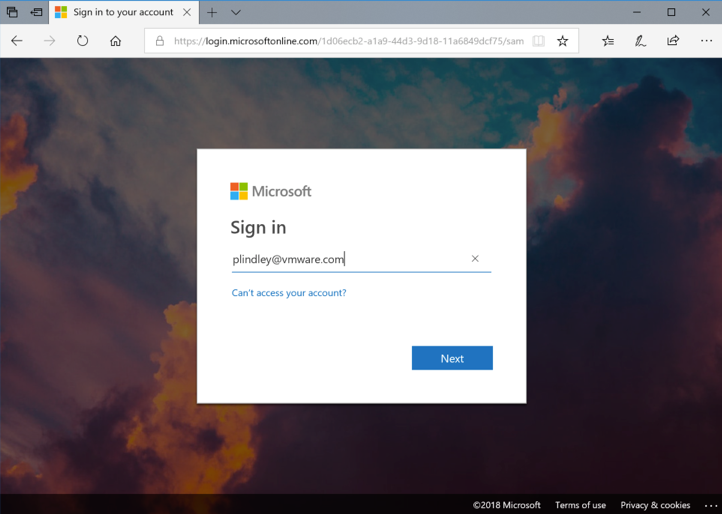
In Identity Manager we obviously need to be using Azure AD as the authentication method in the Access Policy. It doesn’t have to be the only one but in order to authenticate as a Guest Account we need to use the Azure authentication method in order to login as this account.
Go to your Identity Manager URL or Workspace ONE App (depending on your Access Policy). If the Access Policy is set up correctly you will see the Azure AD login page and enter the Guest Account details.
Now this is the cool part:
Because the Guest Account I created was an Azure AD account in my Company Organisation it also inherits any federation or conditional access policies that the other Directory has as well. We are using VMware Identity Manager for authentication into Microsoft Services at VMware. As a result, I also need to pass any authentication steps assigned to my VMware account before I can successfully login.
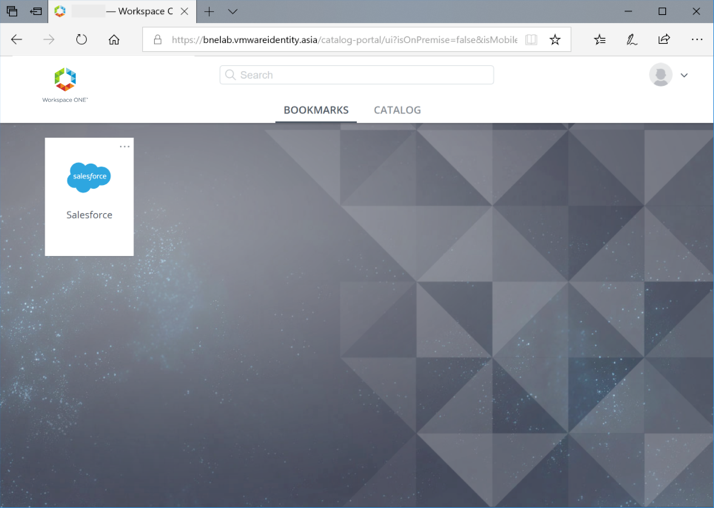
Once I finish all these steps I am then redirected and logged into Identity Manager.
When I go back to Identity Manager, I also now have a JIT account created in that Just-in-Time directory I recently created.
That’s it! I’m sure there are many more use cases than what I outlined above. Add a comment below if you’re using this or find it useful. I would love to hear about how other places may use this.


Leave a Reply
You must be logged in to post a comment.