 VMware has done a lot of work in the past few years with Application Deployment as part of our Windows 10 Management capabilities.
That is why it’s taken me so long to get to this article – I didn’t know where to start without being overwhelmed!
For Application Deployment on Windows 10 with Workspace ONE UEM, we (predominantly) support .MSI .EXE and .ZIP files as installers. We also have a lot of parameters and capabilities around deploying these to cover many scenarios. Below you’ll find a good overview of what we can do and why you may want to choose one over the other.
Ideally, you’ll want to use a .MSI as your installation source. These are much easier to deploy as the install and uninstall parameters are usually the same for all Apps. Next up are .EXE files. These are much more common for older applications and usually can be installed silently. The downside to these are the install parameters are different across the board and uninstalling them can be tricky. Lastly, we have .ZIP files. These are great because they can contain any combination of files and scripts to do any kind of complex install routines. This means that if you need to do something in a specific order and copy a file, as long as you can script it using Powershell/BAT file/VBS it will work.
Let’s take a look at how to configure these in a bit more detail.
MSI Files
MSI stands for Microsoft Installer. The installer for this uses msiexec.exe on your Windows PC to run the installer files and like I said, the install parameters are usually pretty standard. As an example, ” /S ” at the end of the install argument usually means Silent (as in do it all in the background and don’t show and progress/windows).
For this example, I used 7zip as the installer. This is easy to get your hands on and comes in MSI format.
To install this, go to your Workspace ONE UEM Console and go to APPS & BOOKS -> Applications ->Native and then Add Application.
Once you select the Add Application button above, you’ll see the option to upload a file. Locate your downloaded .MSI file and press save to upload it.
MSI File Installation:
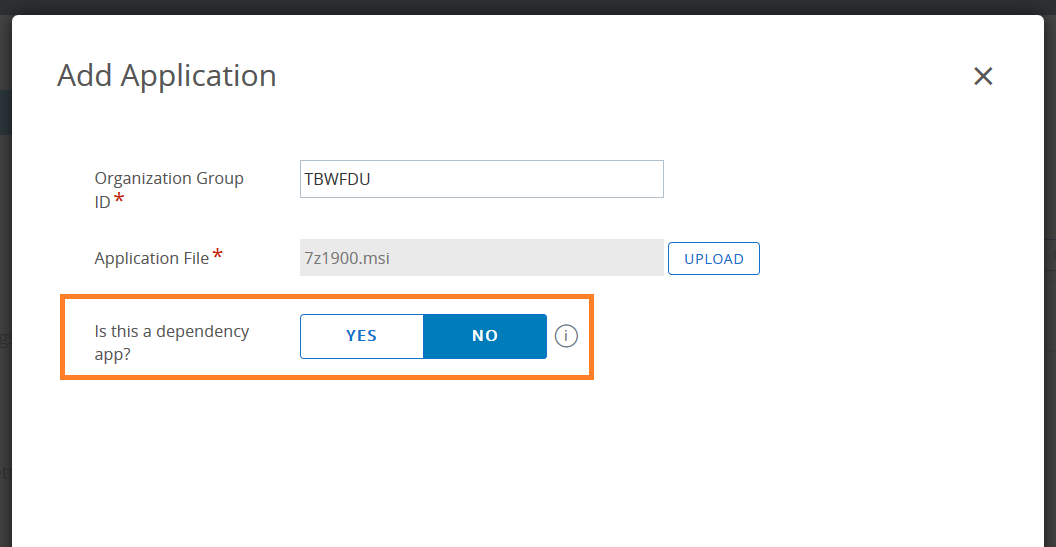
Once it has uploaded, you’ll be asked if this is a Dependency App. This is a kind of app that other apps depend on as part of their install. This of this as being useful for something like Java or .NET frameworks. If you say “YES” here, that’s all the configuration options done. It can now only be used as part of another install process.
This isn’t a dependency we select NO then Continue.
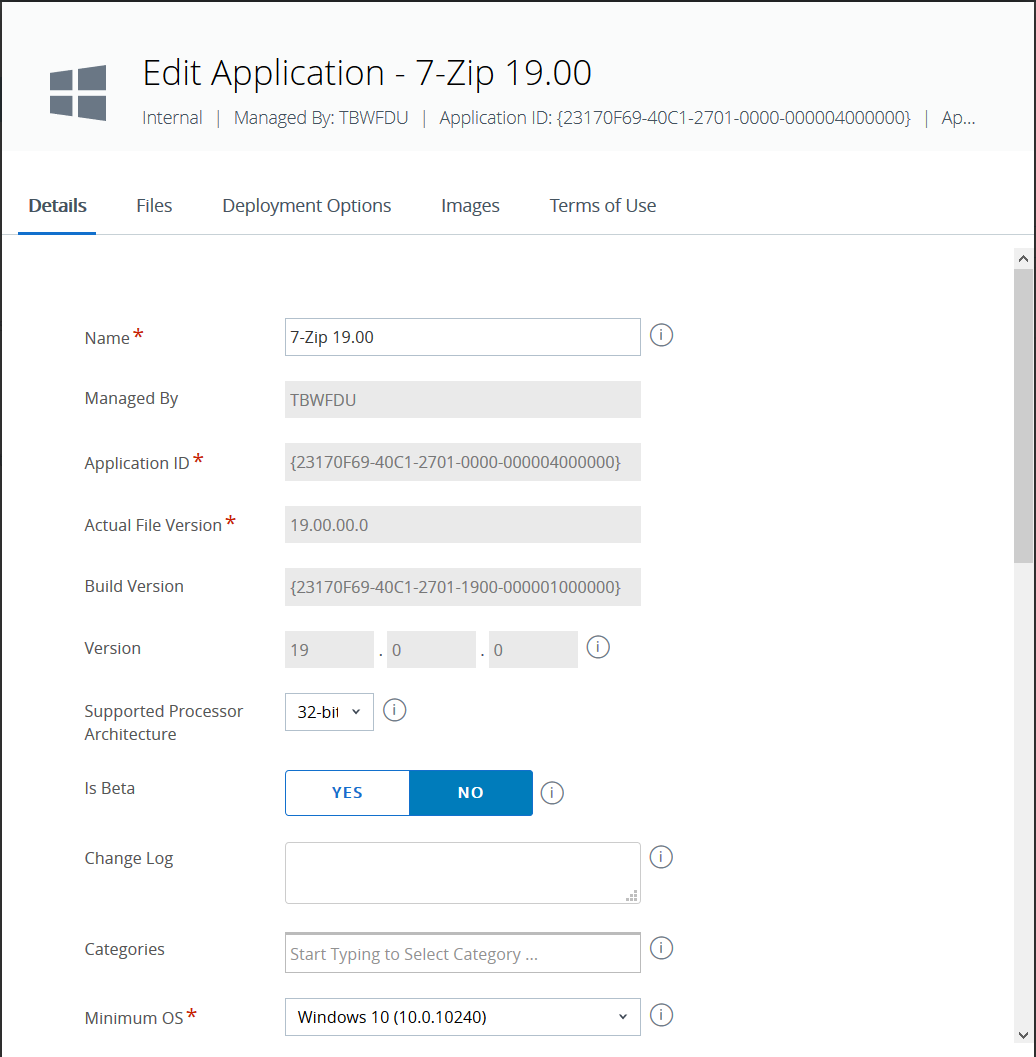
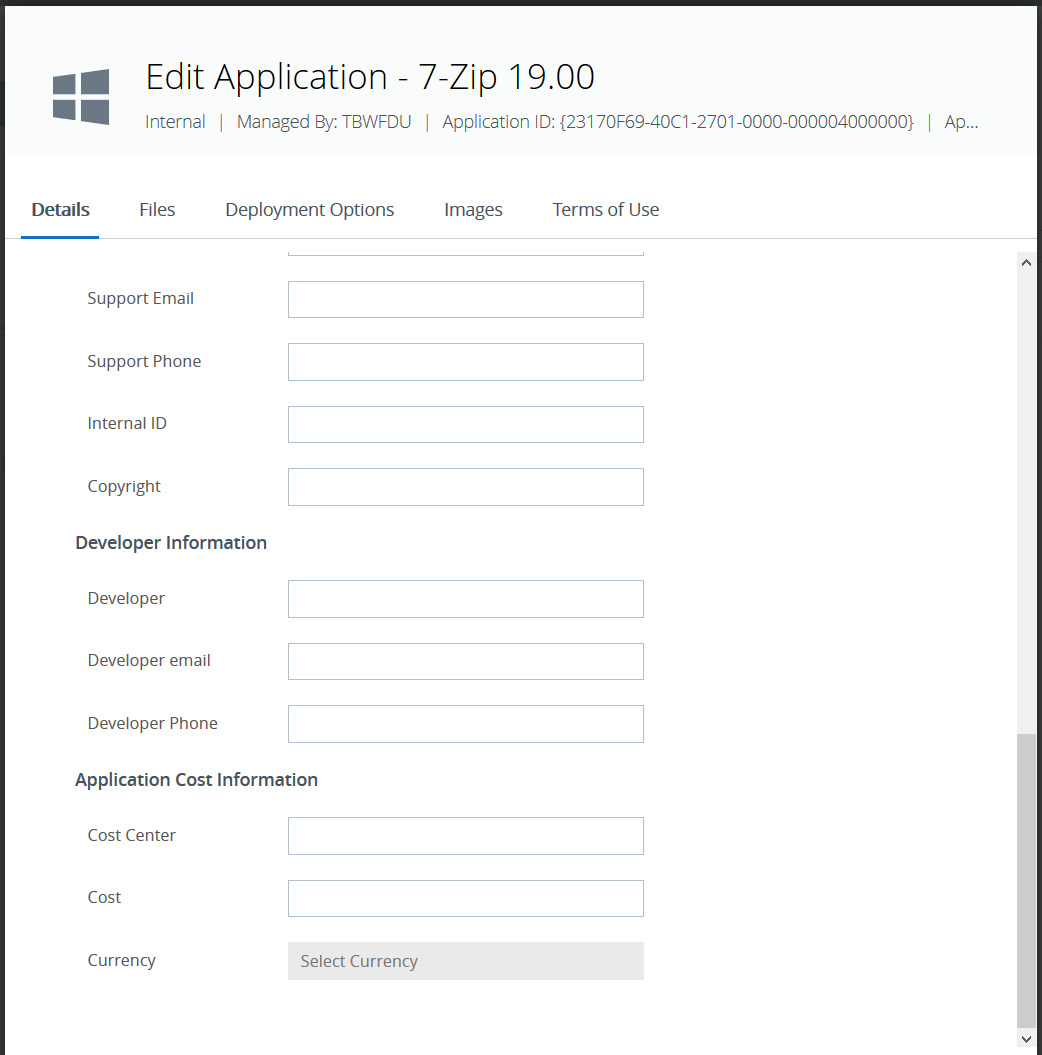
Now we get into the main part of the deployment configuration. We first land on the Details tab. This just allows us to configure the name it will appear as in the Console and just some basic metadata about the developer, cost etc. if you want to. These aren’t mandatory.
The next tab along, Files, is where you could select a Dependency to install before this. As mentioned, it could be .NET framework which if defined here would do the install of that first (if not already installed as a dependency of another app).
Because we’re using the MSI format, we have access to Transforms and Patch files (.MST and .MSP). These are ways of sending additional configurations to the install process (.MST) or patching the repacked MSI (.MSP). You create these when repackaging an installation file using tools like Wise Packaging Studio or Flexera AdminStudio.
You can upload and MST or MSP files you have here. For those who use these, the MSPs can also be cumulative.
The Deployment Options tab is the main one. In here you can specify all the contingencies and install parameters.
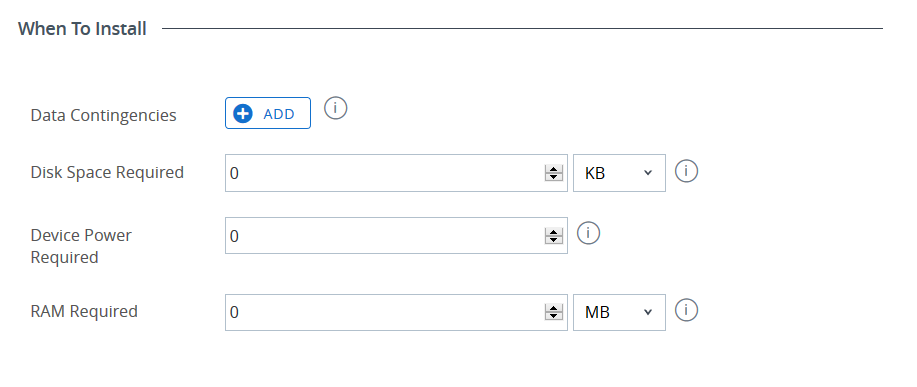
When To Install allows you to specify criteria to check before the install process is started. The obvious ones you see here are Disk Space, Power and RAM required (you don’t want it to fill your drive, power off during install or not run), but under the Data Contingencies area you can have the installer check that an App exists, a File exists or even a certain registry key. This is incredibly powerful and flexible.
How To Install really comes down to the individual application and how it needs to be installed. What you will notice is that the Install Command is prefilled – this becomes obvious as to why I mention this later. The reboot and installer success codes are usually the default if the developer as packaged the MSI correctly. But, you may need to change these depending on your app.
When To Call Install Complete for MSI installations usually don’t need to Use Additional Criteria because it will use the Installer Success Code above. However, for some reason, if you need to ensure something else you can set this to YES and then select the criteria. We cover this more in the .EXE installation.
Lastly, Images and Terms of Use are pretty self-explanatory. You upload the icons and images for the application as you want it to appear in the catalog and a Terms of Use that the end-user must accept before it installs if you wish.
EXE File Installation:
We can follow a very similar process for installing applications that only have .EXE installers. I’ll skip the first few steps about dependencies and where to upload as it is exactly the same.
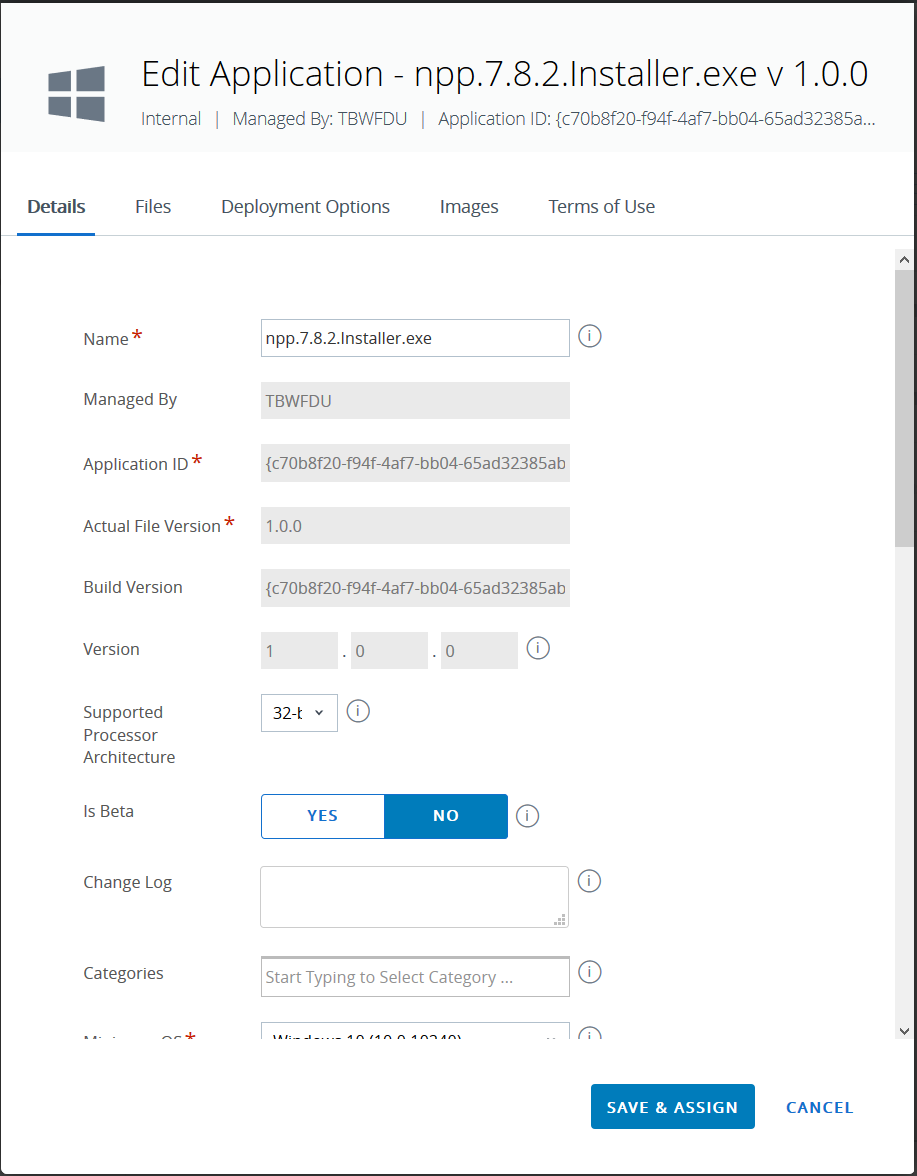
You’ll see here after uploading the .EXE file the Details tab look very much the same.
On the Files tab, the important difference to note for .EXE installs is that you must define an App Uninstall Process. You can upload a predefined script if you have one, or specify the actual command that needs to be run in the field in the Console.
You will need to find out what this is, or if you don’t enter this or its incorrect it won’t uninstall and would throw an error in the console.
In this specific example, I found the uninstall process on the Vendor website so I could enter this here.
On the Deployment Options tab, When To Install works the same way as .MSI files.
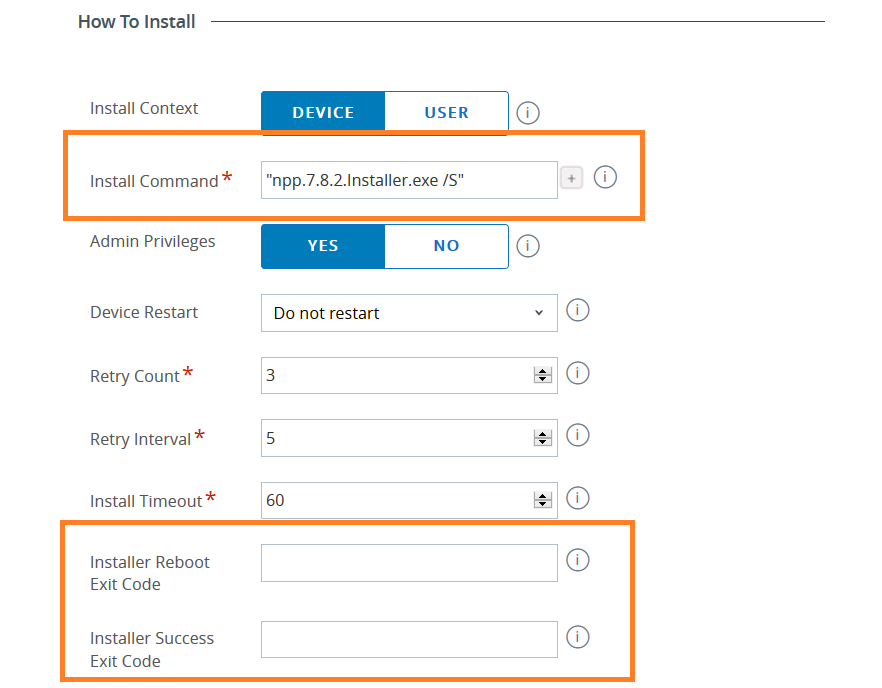
How To Install is also something that is different. You also must specify the Install Command and it is not pre-populated. So, like the uninstall command you need to find out what the install command is.
You will also see that the Installer Reboot and Success Exit code is blank. These aren’t needed because it’s not using MSIexec and probably doesn’t return a code.
So, the way we actually check as part of the process to see if the install is successful is under the When To Call Complete section. We skipped this in the .MSI section, but for .EXE its mandatory.
The easiest way I’ve found to this is to check that a file exists (as in, the install succeeded and put the files in Program Files as an example).
Under defining criteria you can select Add, and then check if a file exists.
Lastly, Images and Terms of Use of the same as above as well.
Tip: I’ve found installing .EXEs more painful than .MSIs because you need to find more information. For me, its much easier to test my install command line parameters and the File Locations etc. on a Virtual Machine before putting them into the Console. That way you can ensure the command is right instead of having to deploy it via Workspace ONE UEM and waiting for it to download, install and checking logs etc.
.ZIP File Installation:
I’ve actually realised that I have already technically covered installing Windows 10 Apps using .ZIP files in a previous article:
This was a very detailed article, but really outlined with .zip files, you are able to have all the installers, dependencies, scripts etc. in a single file and Workspace ONE UEM is smart enough to unzip and run the installation script you specify.
Doing it using this method allows you to be much more granular and detailed with the install process – as long as you can script it though. It is a double up from some of the other capabilties with dependencies from the other methods but allows you do have more than one dependency app install, as an example.
The Others:
I do need to mention that we do also have the ability to install .APPX packages, as well as integrating with the Microsoft Store for Business.
Installing APPX packages is not common in my experience and you need to have a properly signed developer cert.
As for Microsoft Store for Business, VMware already have this documented
here.
Additional Information:
 VMware has done a lot of work in the past few years with Application Deployment as part of our Windows 10 Management capabilities.
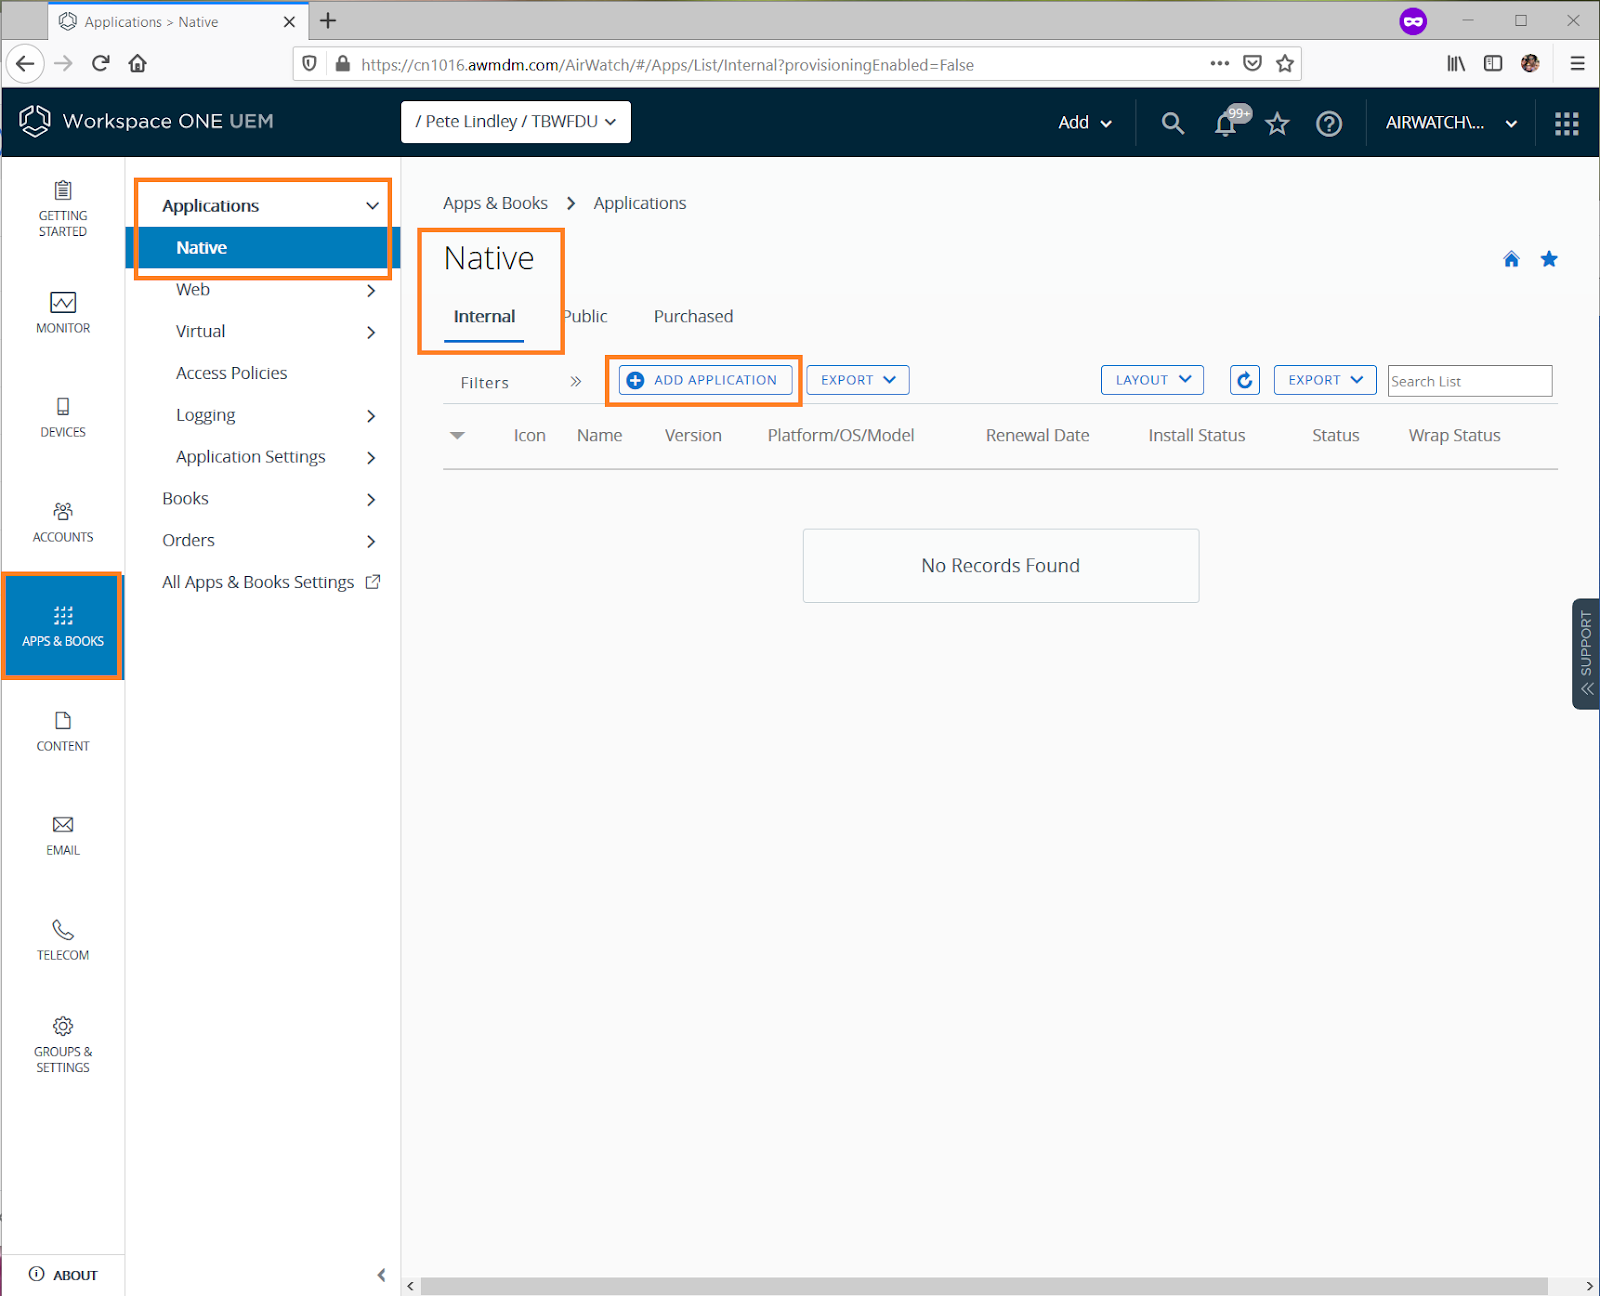


Leave a Reply
You must be logged in to post a comment.