 With Windows being around for 30 years, it is no surprise that the software and configuration baggage its brings along with it to enterprise is extensive.
Unlike the truly modern mobile world, Apps for Windows 10 are typically not just a single file that lands on the device and runs with configuration being sent over APIs along with the install. Microsoft in some way have tried to transition to this with its Universal Windows Platform (UWP) Apps from the Microsoft Store and Microsoft Store for Business, but in my experience I have yet to see any organisation deliver (or develop) and truly enterprise level application using this platform.
This is why we are still nearly completely reliant on traditional Win32 Apps and needing to find a way to manage those “legacy” formats and processes in a modern management framework. VMware Workspace ONE UEM has made massive investment in development and enhancement in these capabilities and our customers are continuing to see our leadership in this space. We’ve talked a lot about how we can simply and robustly deliver .MSI and .EXE files and at scale, however its most often used when deploying a single installer with maybe a transform file and some checks to see if there’s enough disk space.
But what if your install routine is more complex?
In the good ol’ Airwatch days we would suggest using Product Provisioning. This is a very powerful capability built into the Workspace ONE Intelligent Hub Agent which allowed you to push the required installer files and execute scripts in order on client device. These installers and files were uploaded and stored in the database, or at best offloaded to an FTP server inside the customer’s network. But this goes against the Modern Management framework where we should be reducing infrastructure and leveraging Cloud platforms like the Workspace ONE Content Delivery Network.
Luckily, in Workspace ONE UEM we have the ability to do the best of both by leveraging the .ZIP file upload capabilities of Win32 App Management. Just to be clear, this is not taking away from how comprehensive the 32 App Deployment capabilities are, this is just another under utilised way to install applications with complex logic and orders.
At a very high level, you create a ZIP archive of your installation files (executables or MSI files) and provide a script with the install logic and instructions in it. You need to still write your own script to do the install, but using this method distributes the install files to the CDN and allows you to define your own install logic as well as all the contingencies etc. of our App Deployment framework.
The rest of this article will cover off how to prepare your installers for ZIP file deployment as well as an example of another (I believe Open Source) tool that I was introduced to called PSAppDeployToolkit to help with the installation script.
I’ll start off with the Workspace ONE side. The only pre-requisite for deploy apps using a zip file is that you have a script that defines the install commands (I’ll give a high level example of one I used later) and the zip file itself contains either a MSI or EXE file. You can have any file structure you want and the Workspace ONE Agent knows to extract the package. That means that all commands are now relative to the root of the extracted package.
Now you just need to upload it to the Console.
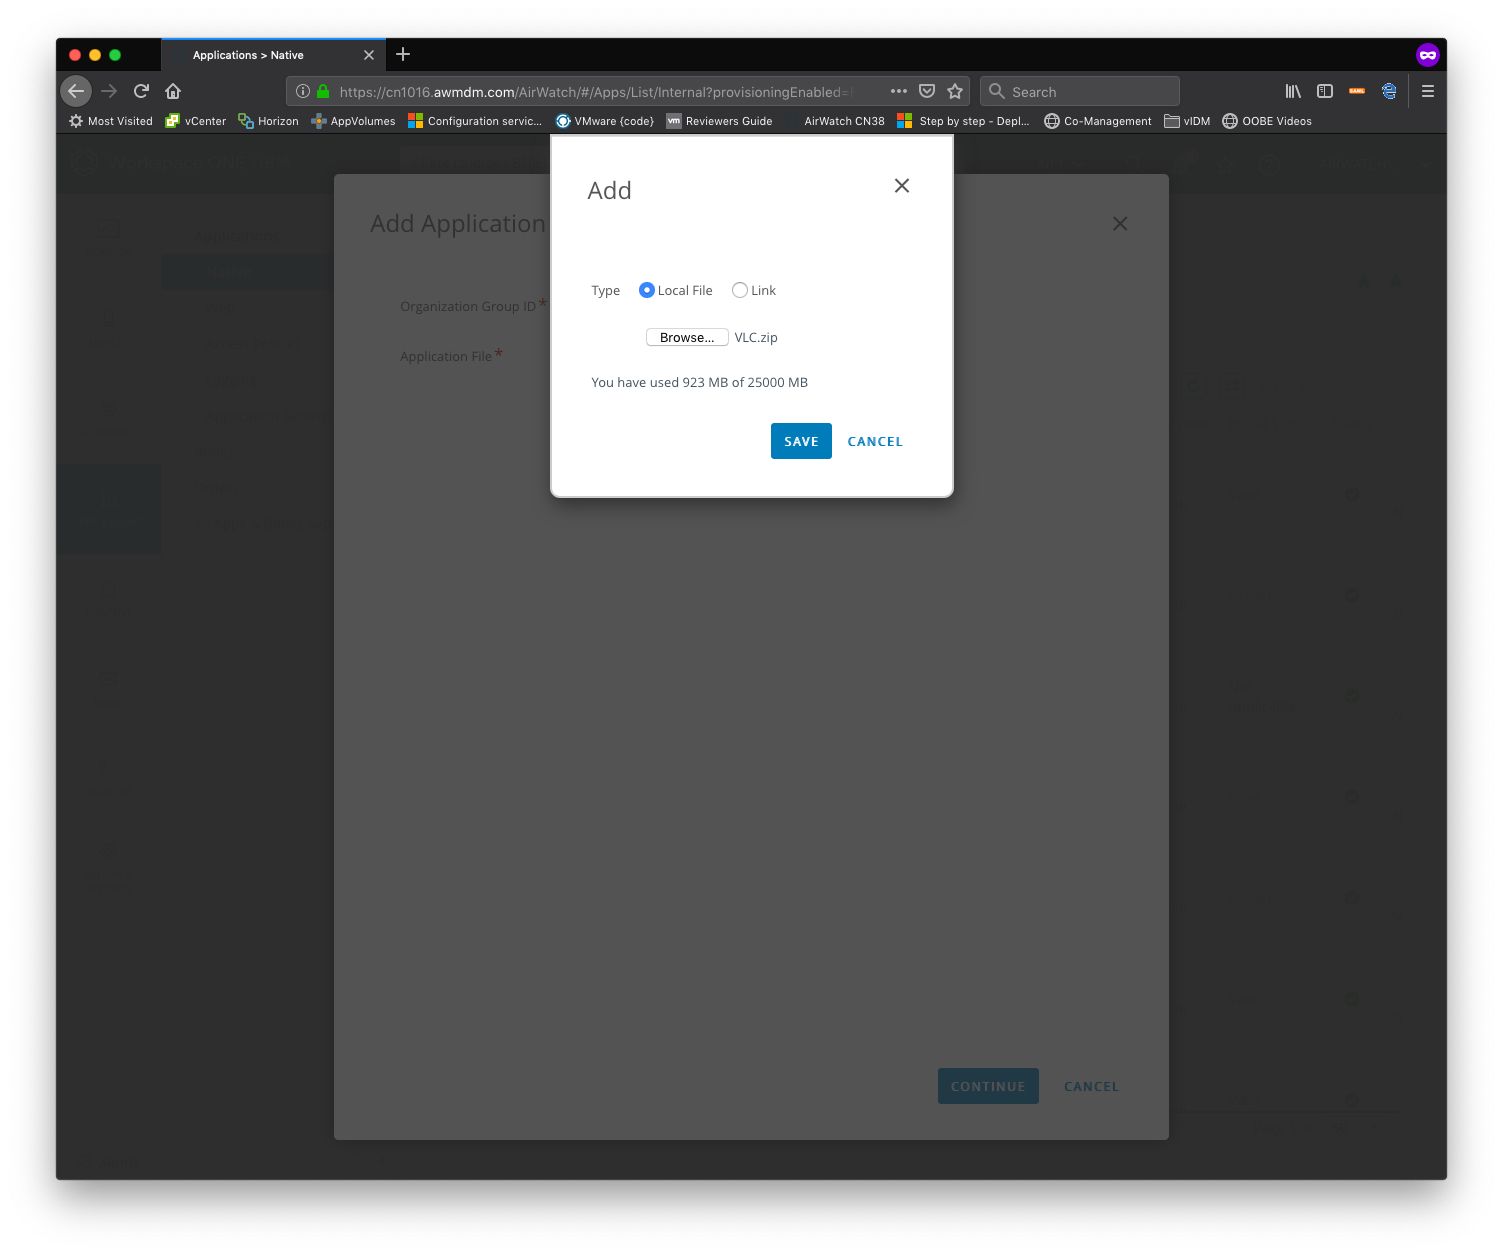
To do this, go to Apps and Books -> Native -> Add Application

From here you just need to locate your ZIP file and upload it. This will also check that your pre-reqs for the ZIP are met (see above) and will automatically distribute it out to the CDN.
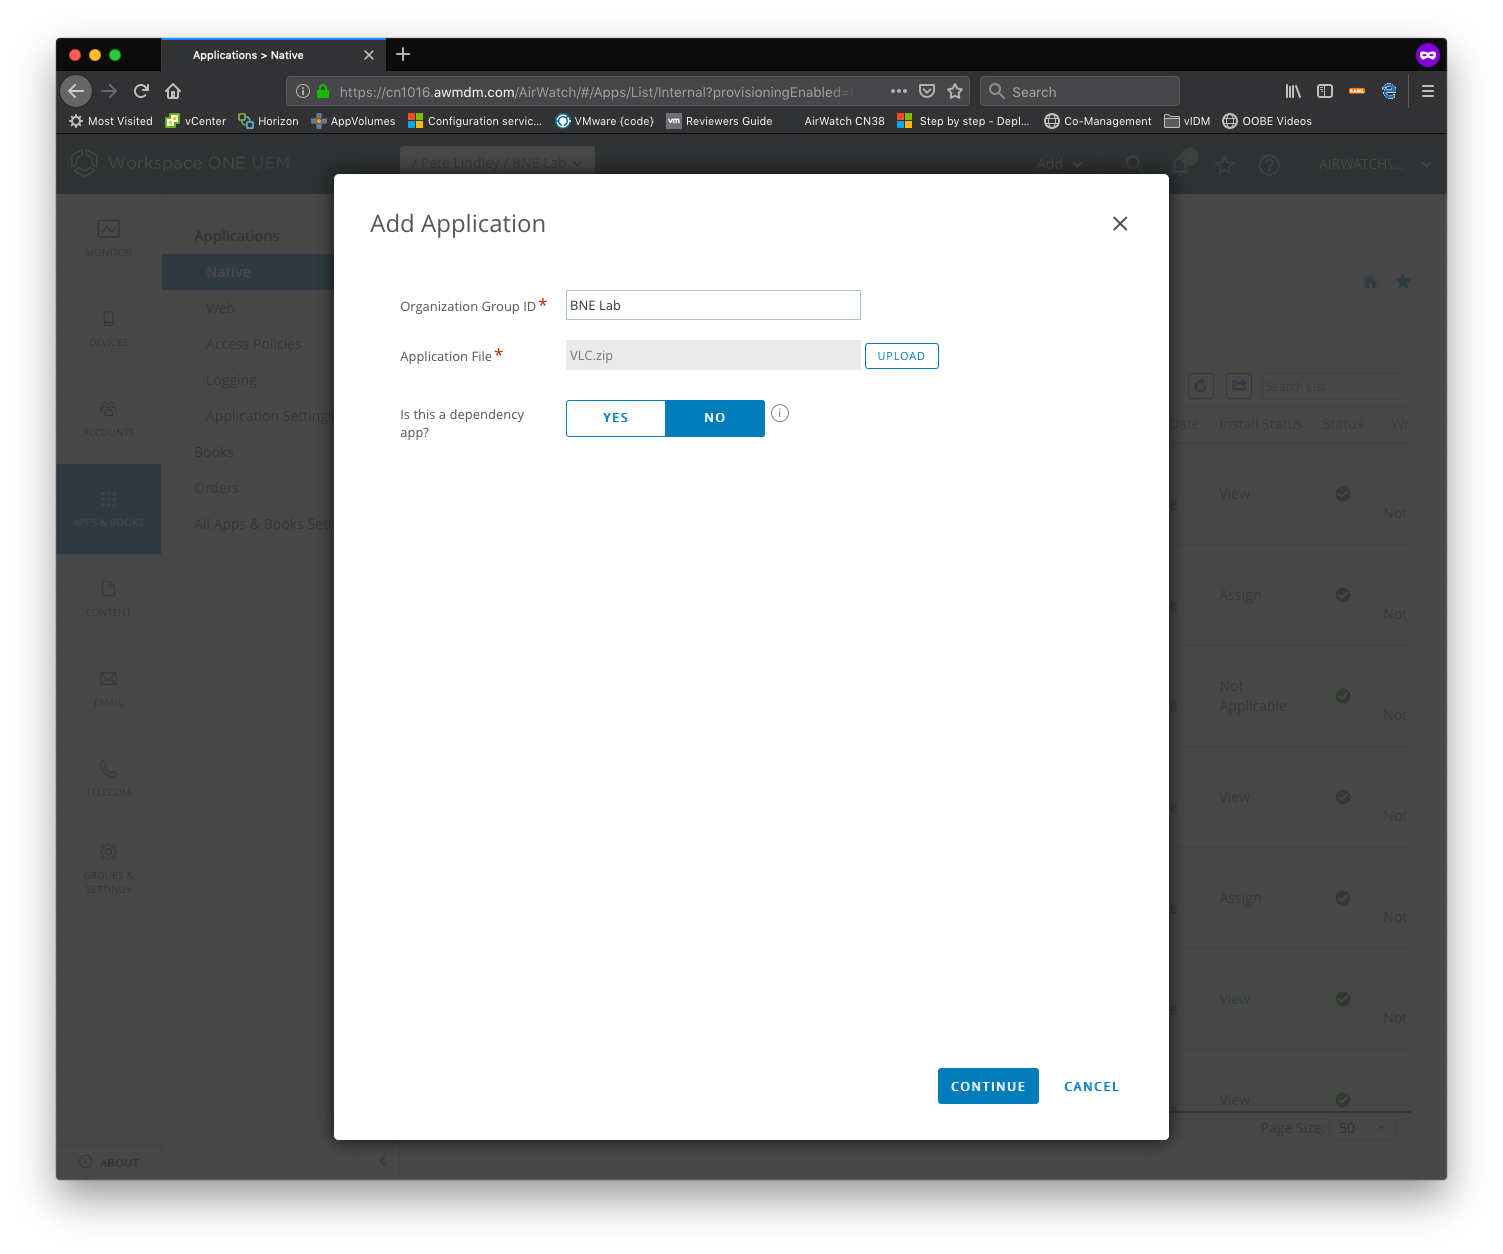
You’ll see a nice progress bar as it is uploading, and when its done you’ll be asked if this is a Dependency App. A dependency is an application that is depended on by other applications. Think of it as “this app must be installed already, or otherwise make it available to be installed before the other install can proceed” – a good example is Java or the .Net Framework. In our case its not a dependency app so we’ll click No here then continue.
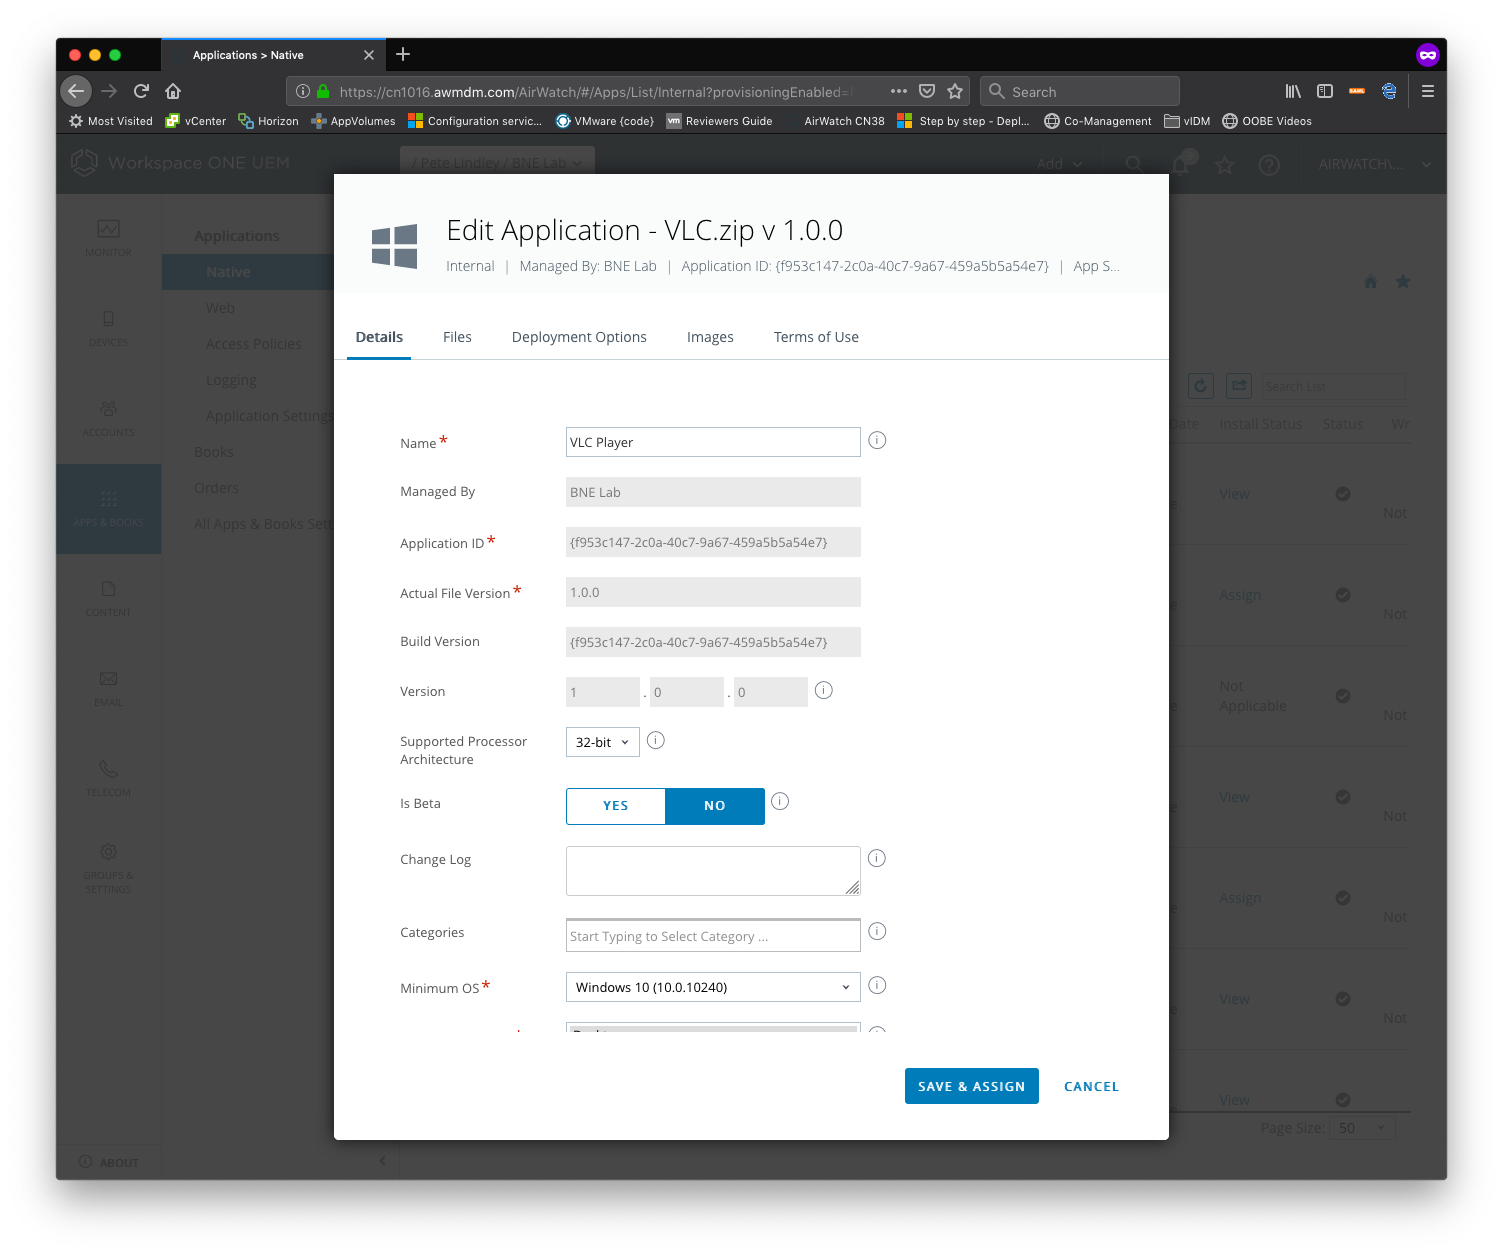
In the details page, you’ll be able to fill out any information thats relevant to either the administrators or users. I’d suggest change the name from filename.zip to something more relevant eg. “VLC Player”.
Under Files, you’ll be able to select dependencies (see above) but on this page the main thing we need to configure is the Uninstall Command. This will be relevant to your ZIP file or process, but for my example a screenshot is below.
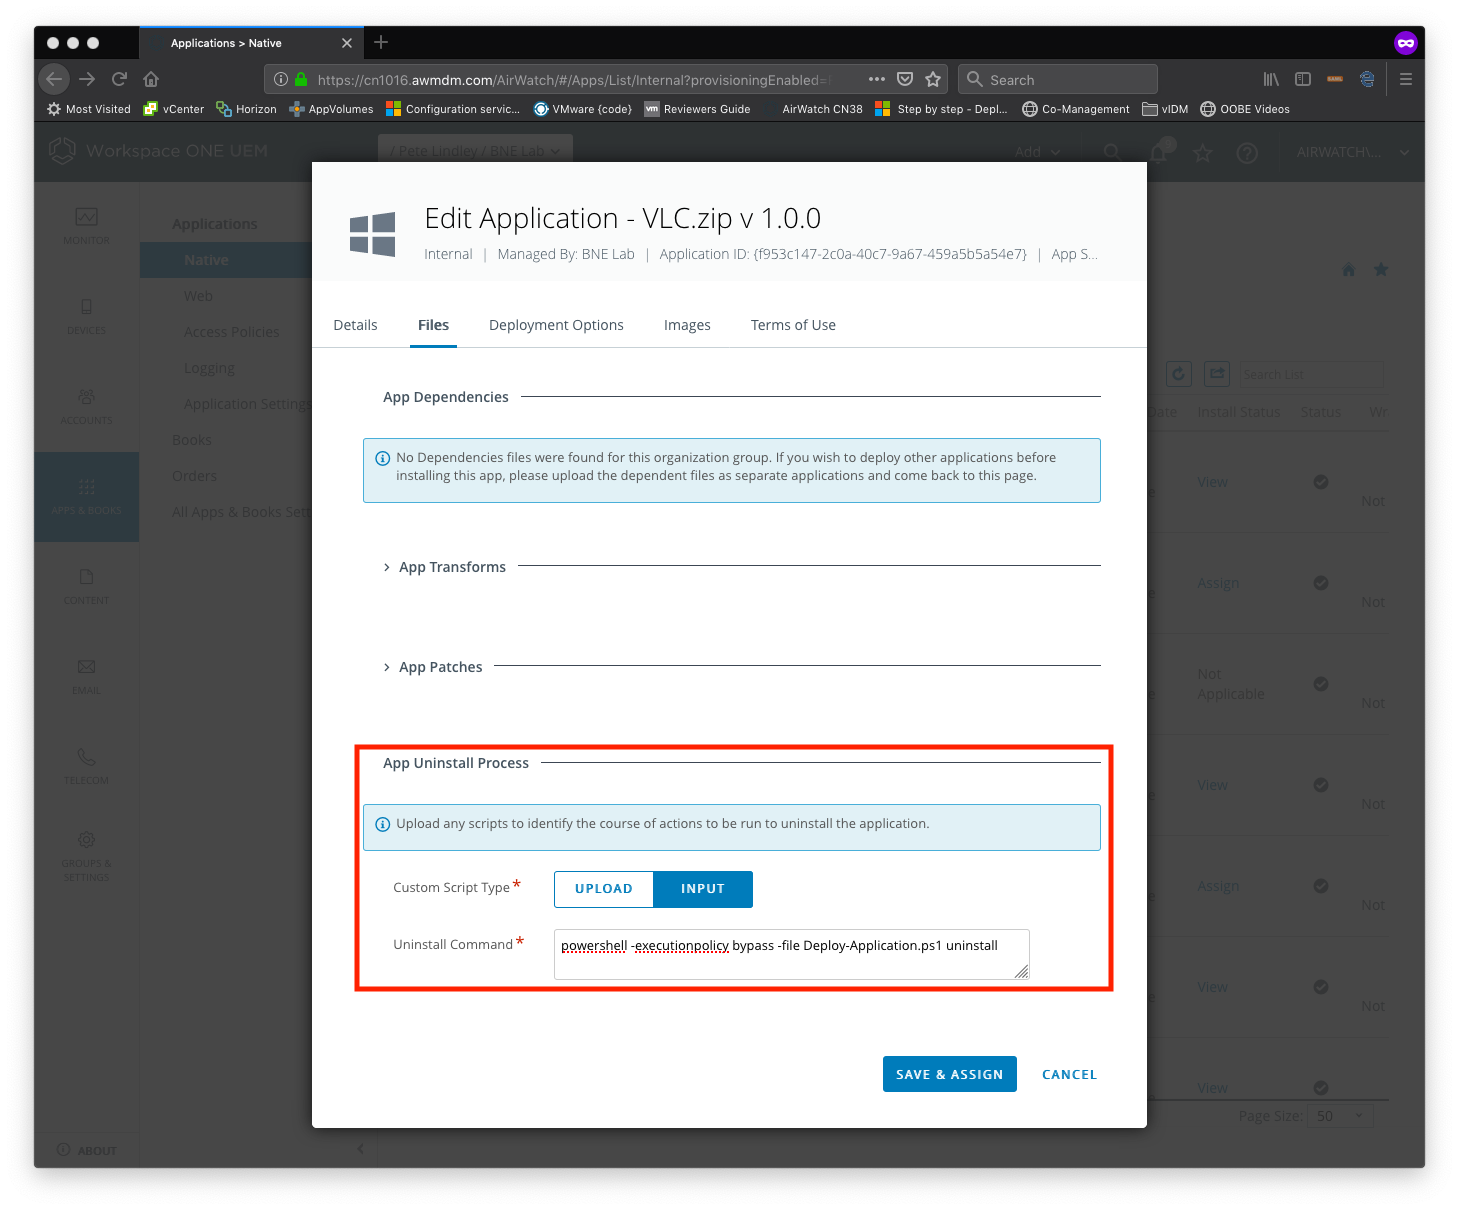
You can either upload a script directly, or in my case enter the command. A few things to point out:
powershell -executionpolicy bypass – this allows you to run an unsigned/unknown Powershell command. If you’re already managing the execution policy in another manner, you can skip defining the execution policy.
-file Deploy-Application.ps1 uninstall – these are parameters passed to the powershell command. Deploy-Application.ps1 is the script in my ZIP file and uninstall is parameter built into the script that tells it to run the uninstall routine. Note that this will not be relevant if you aren’t using the PSAppDeployToolkit and you should adjust this for your scenario.
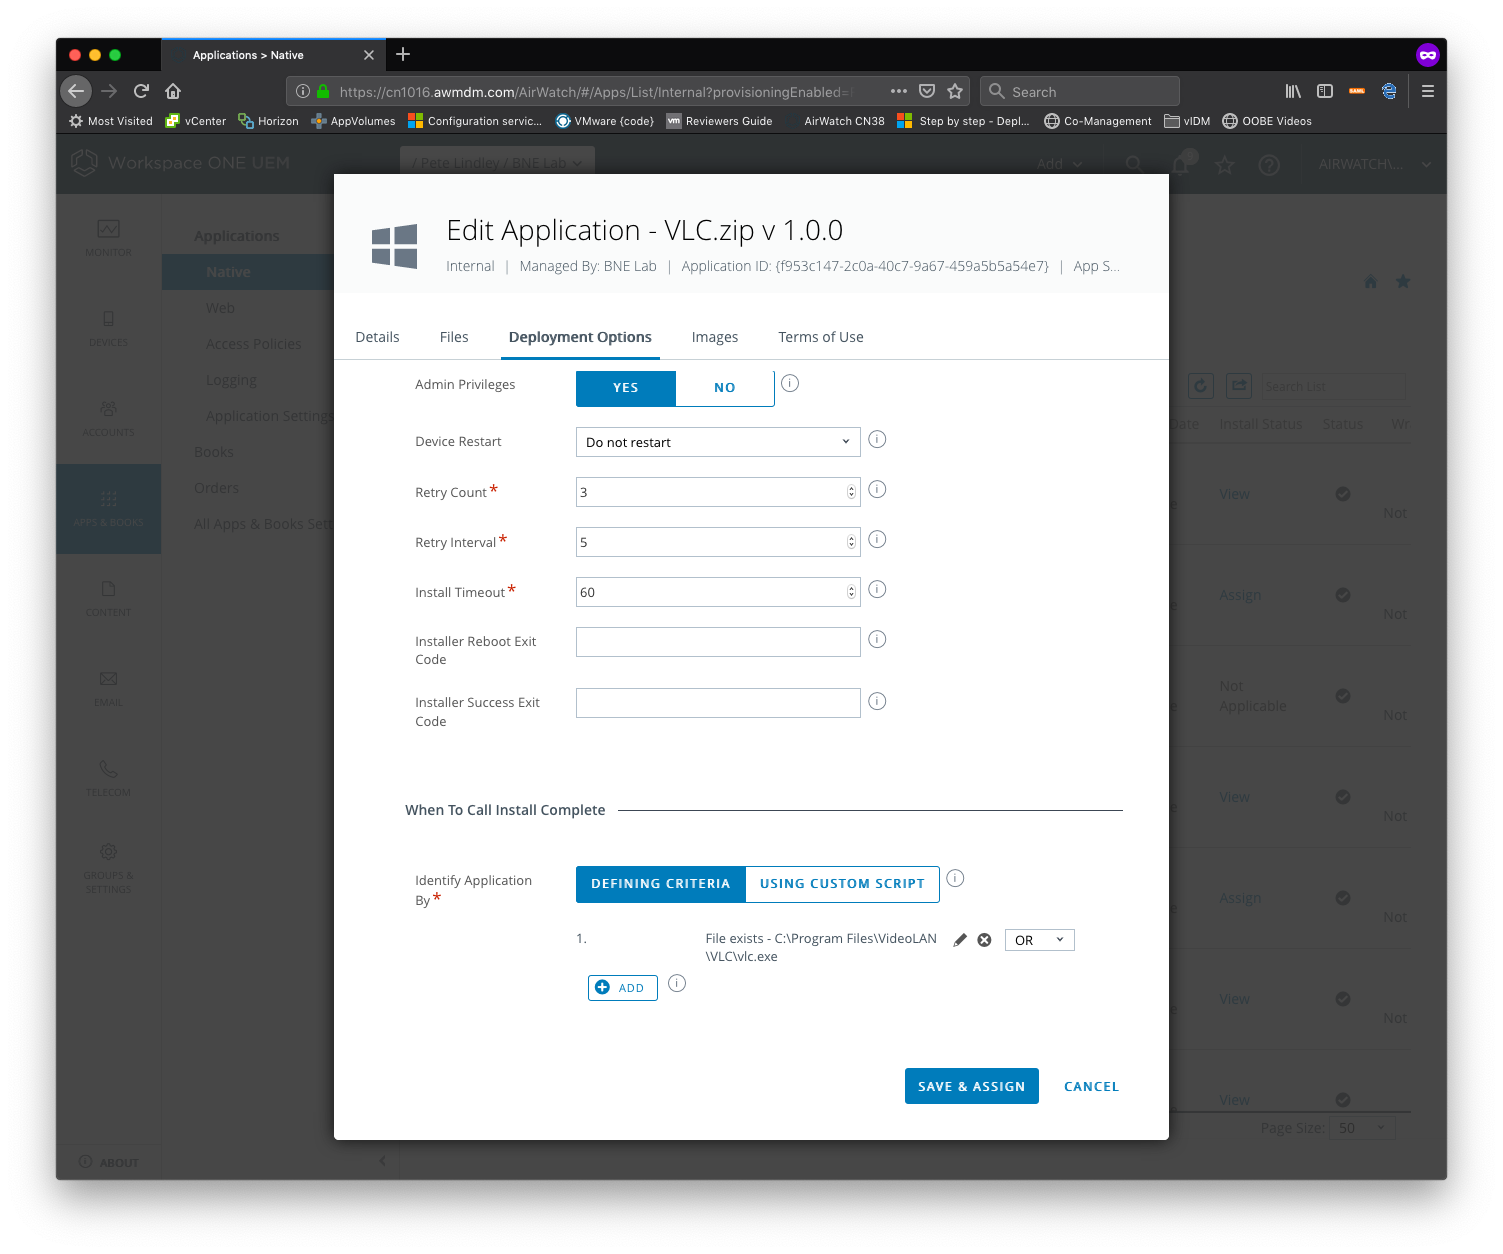
The Deployment Option tab is where more of the Workspace ONE UEM magic comes into play. We can add data contingencies (does an App exist, does a Registry Key exist etc.) right down to making sure there’s enough disk space or RAM to support the application. The Agent will do these checks before deploying your App.
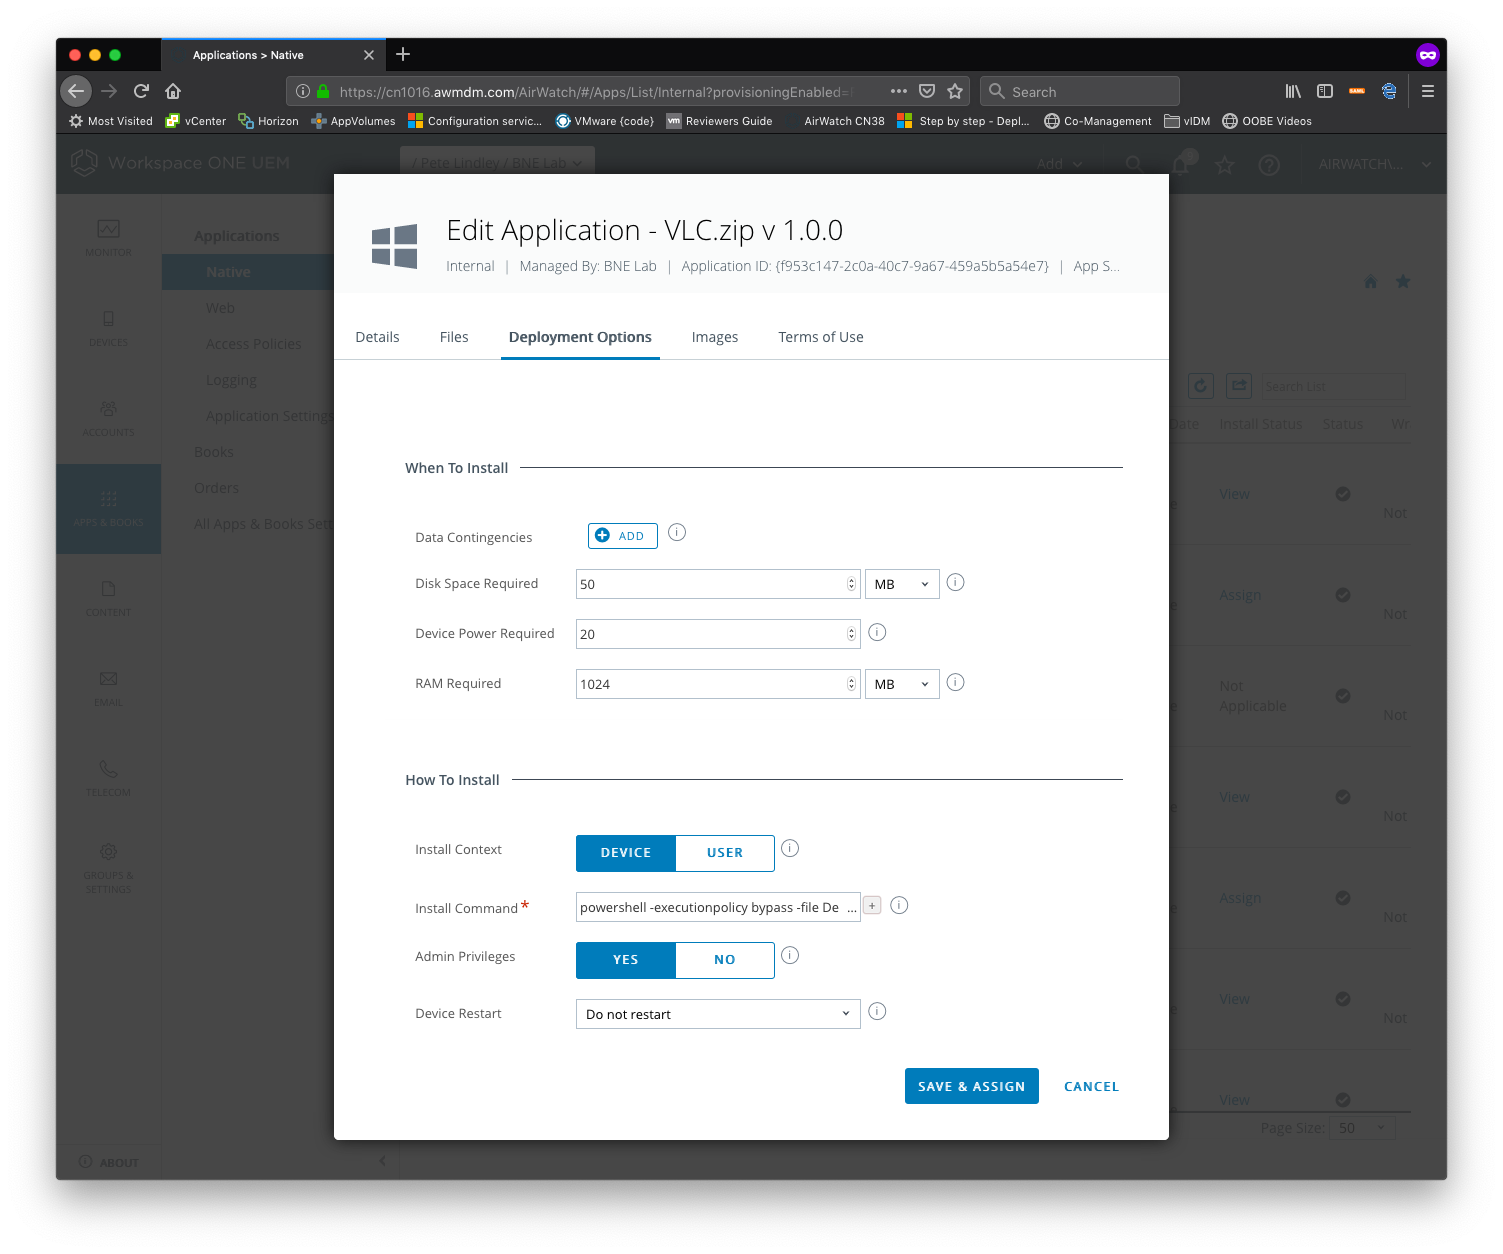
Same as the Uninstall Command, you must specify the Install Command. You can’t see it here, but the command (once again because I’m using the PSAppDeployToolkit) is
powershell -executionpolicy bypass -file Deploy-Application.ps1 install
The other great thing here is that because the Agent has admin privileges, you can install Apps as an Admin but without the User needing to be a local administrator. You can also specify if a restart is needed or any custom status codes if you’re building that into your script. The last thing you have to specify is the criteria that the application has successfully installed. You could use another script, look in Add/Remove Programs for the Application Identifier or keep it as simple as mine and look to see if a file exists. It really depends how your complex your App and installation process is.
The last two tabs are self explanatory – you can specify any images and icons for the apps to change how they appear in the Application Catalog and also set a Terms of Use that the user must accept before the installation will proceed.
From here you just need to Save and Assign the App and specify the Assignment Group you want the Application to be available to.
And thats it! The ZIP will be deployed to the machines in the Assignment Groups you specified, unzipped if all the defined criteria is met it will run the script you specified to complete the install.
BONUS ROUND!
If you’re still interested, I’ll add a bit of a run through of the PSAppDeploy toolkit. I found it very useful but there was no real instructions I could find so had to do a fair bit of Googling.
In my examples above I demonstrated installing VLC Player using a ZIP file. It isn’t really complex at all, but as we go through I’ll point out how to extend the scripts to accomodate more challenging installers.
A lot of existing PCLM admins are scripting gurus – they need to be to be able to support such a complex Operating System. They have to install an Antivirus Framework, then the AV Agent, then the patch updater and force a scan before the VPN client can install. This needs to be done immediately after enrollment and in that specific order. That’s the use case for this procedure.
Anyway, I digress.
To start, extract your PSAppDeployToolkit download into its own folder. Each time we want to use this toolkit we need to keep the files and the file structure intact. Here’s what it looks like.
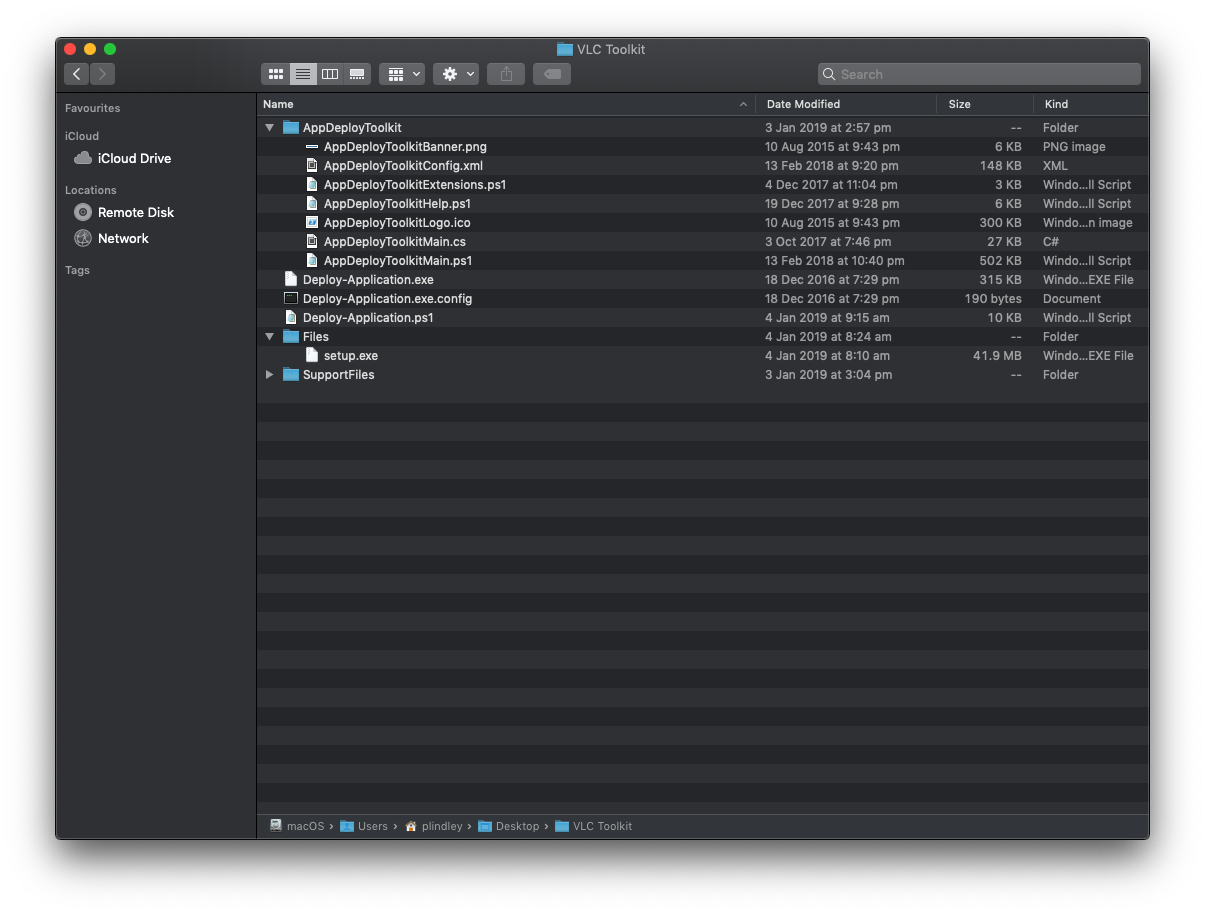
When it is first extracted this is the structure it will take. The only things we are concerned about are:
The Files Directory – This is where your installers (MSI/EXE) should reside.
The SupportFiles Directory – In here you should put any additional 3rd party scripts/reg keys etc.
and finally, the Deploy-Application.ps1 file – This is the script we edit and contains the pre/post install/uninstall commands.
Now to the script, here is a screenshot.
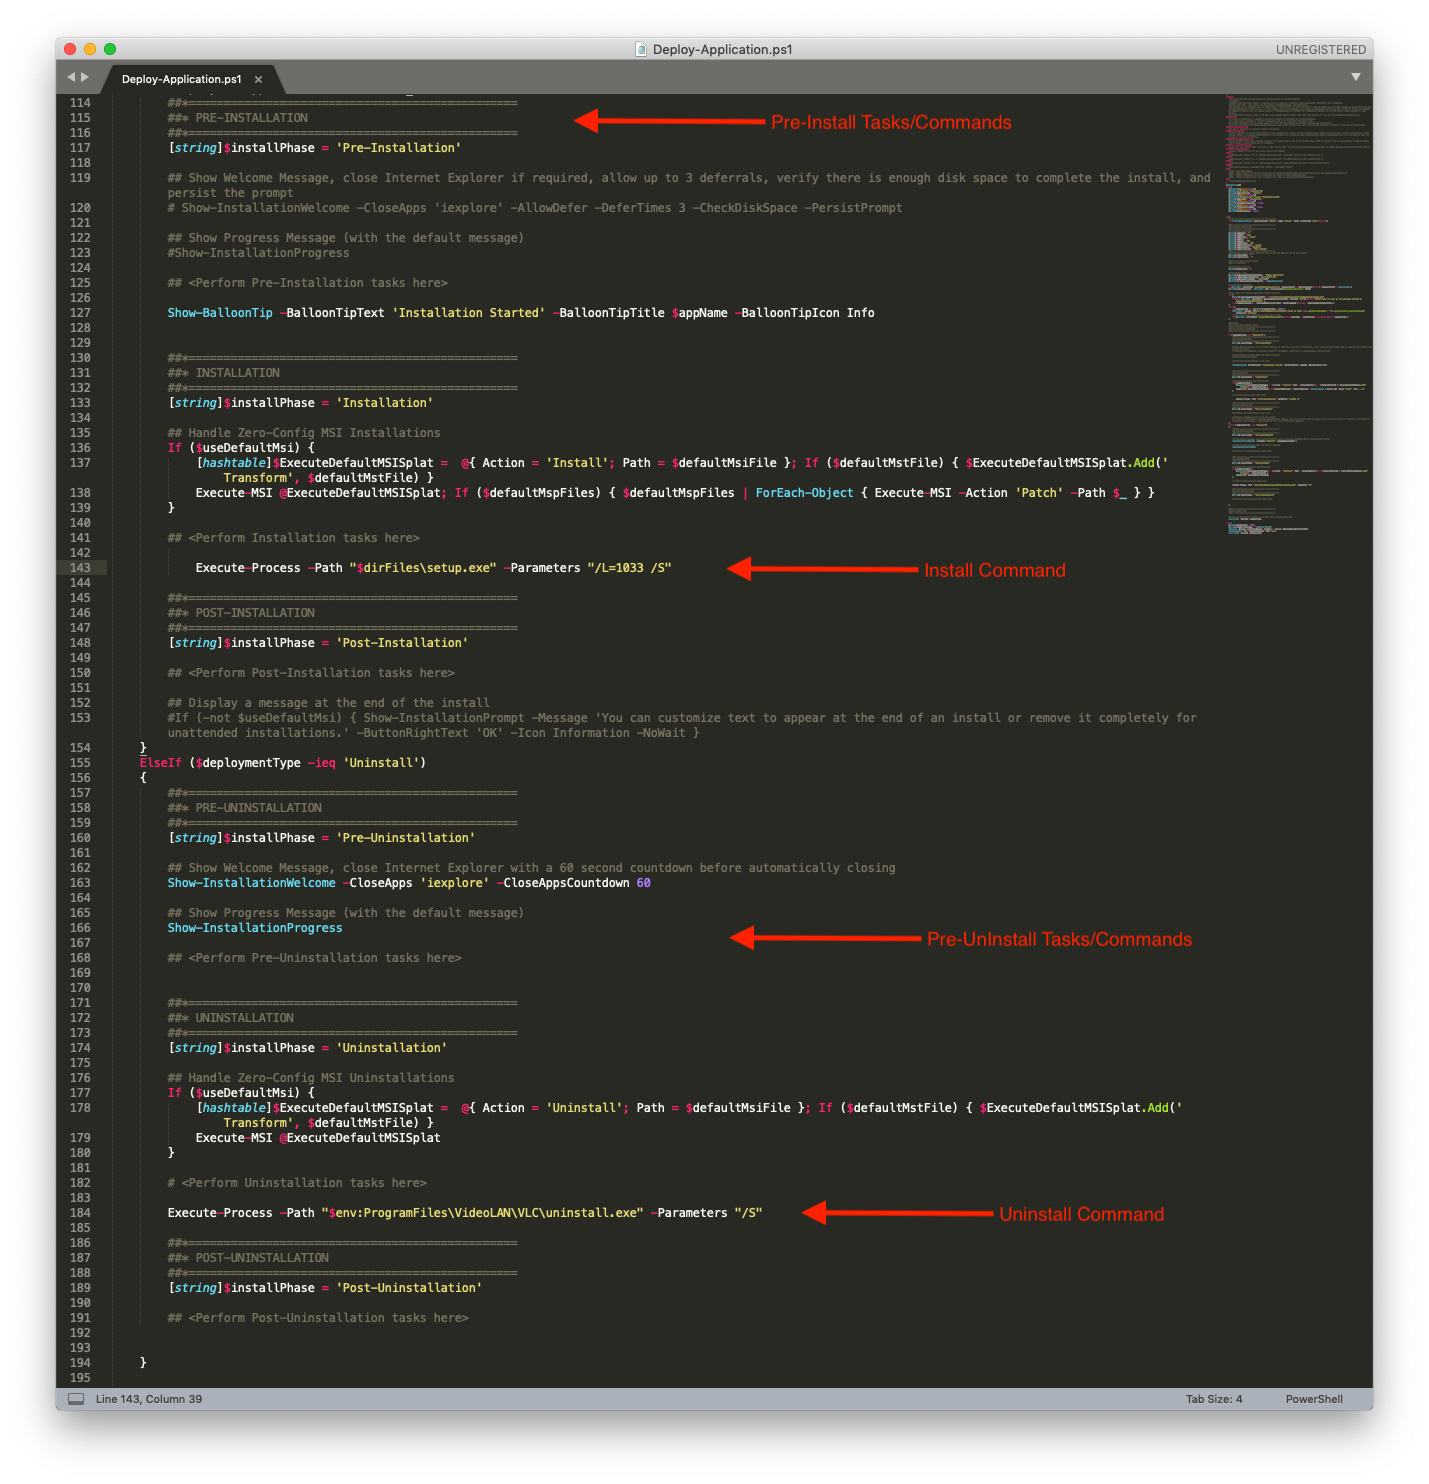
Pre-Installation: Here you can can define any commands or tasks that need to occur before starting the installation. This could be copying a certain file, or kill a process – anything – if you can script it you can add it here.
Installation: This is the actual installation command. The important part here is to not use hardcoded file paths. You’ll notice my example uses $dirfiles which is a variable defined in the script but defines the ./files/ directory. The parameters part is just extra parameters the installer understands – ‘L=1033’ means English and ‘/S’ means silent as an example. This could also contain the multiple installation commands for multiple apps too and will wait until the previous is complete before continuing.
Post-Installation: There are commands runs after installation. This would be where you might want to add a .reg contained in the SupportFiles directory to the device registry as an example.
Uninstallation: As the name suggests this is where you would add the Uninstall commands.
Post-Uninstall: Really? Do I need to keep going? 🙂
Note that in my Install/Uninstall Command example the install & uninstall parameter is defined in the above section so this is where it all ties back.
Just save any changes and make sure you include in the ZIP file so that we can call upon it for installation.
The last thing to quickly point out that there is another Powershell Script from the PSAppDeployToolkit which shows all the additional commands you could add to your script. There are heaps of things like adding a Balloon Notification, show the install progress as well as many more built in variables and commands (an examples) that the toolkit provides.
You can access this Help Console by running the AppDeployToolkitHelp.ps1 file in the .AppDeployToolkit folder.

I’ve only just scratched the surface with the PSAppDeployToolkit but I can see so much potential here to support complex processes. Let me know what you think or if you’re using this already in the comments below!


Leave a Reply
You must be logged in to post a comment.