One of big differentiators we have with Workspace ONE is ability to use MobileSSO to drastically improve security and the user experience.
MobileSSO with Workspace ONE leverages certificates deployed to devices to seamlessly sign the user into the Workspace ONE Intelligent Hub and any federated SaaS services.
This solution requires both Workspace ONE UEM (to deploy and manage the lifecycle of the certificates) and Workspace ONE Access (to challenge the device for the certificate and authenticate the user). On iOS MobileSSO technically uses Kerberos by validating the certificate on the device and generating a Kerberos token the device can then present back for authentication.
In this post I’ll discuss how to configure Workspace ONE Access for iOS MobileSSO and how to create a profile in Workspace ONE UEM to deploy the required certificate and approve the domains and applications that can use it.
So lets start with Workspace ONE UEM. We need to create a Profile for iOS that does a couple of things:
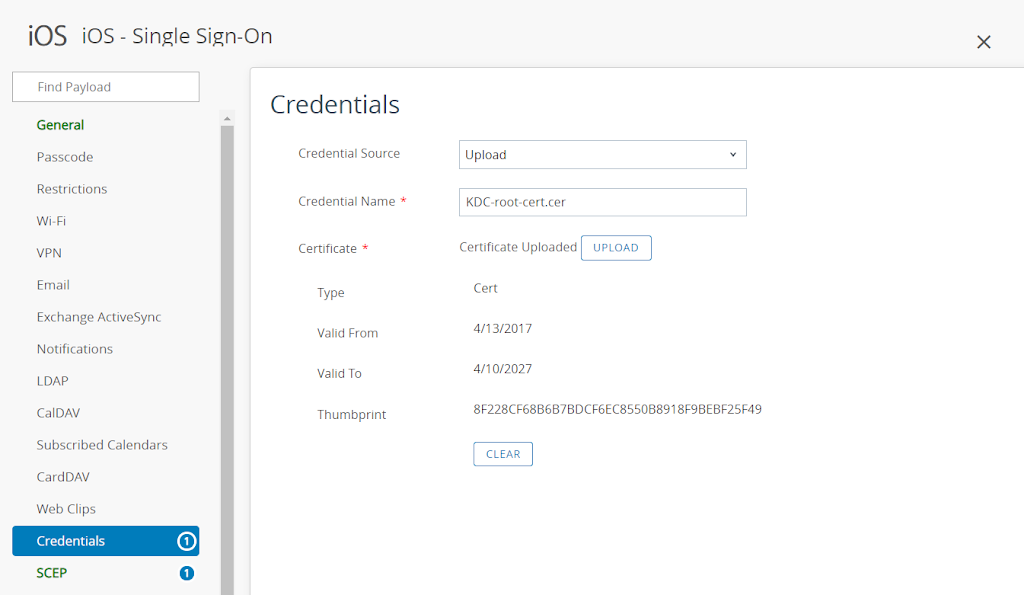
- Pushes down an User Certificate to the enrolled user on the device for authentication to Workspace ONE Access
- Configures the device to specify which URLs can use SingleSignOn and also which applications are approved to use SingleSignOn.
Let’s start.
Create a new Profile for iOS. Fill out the General section with the relevant information as per my post on Profile Basics.
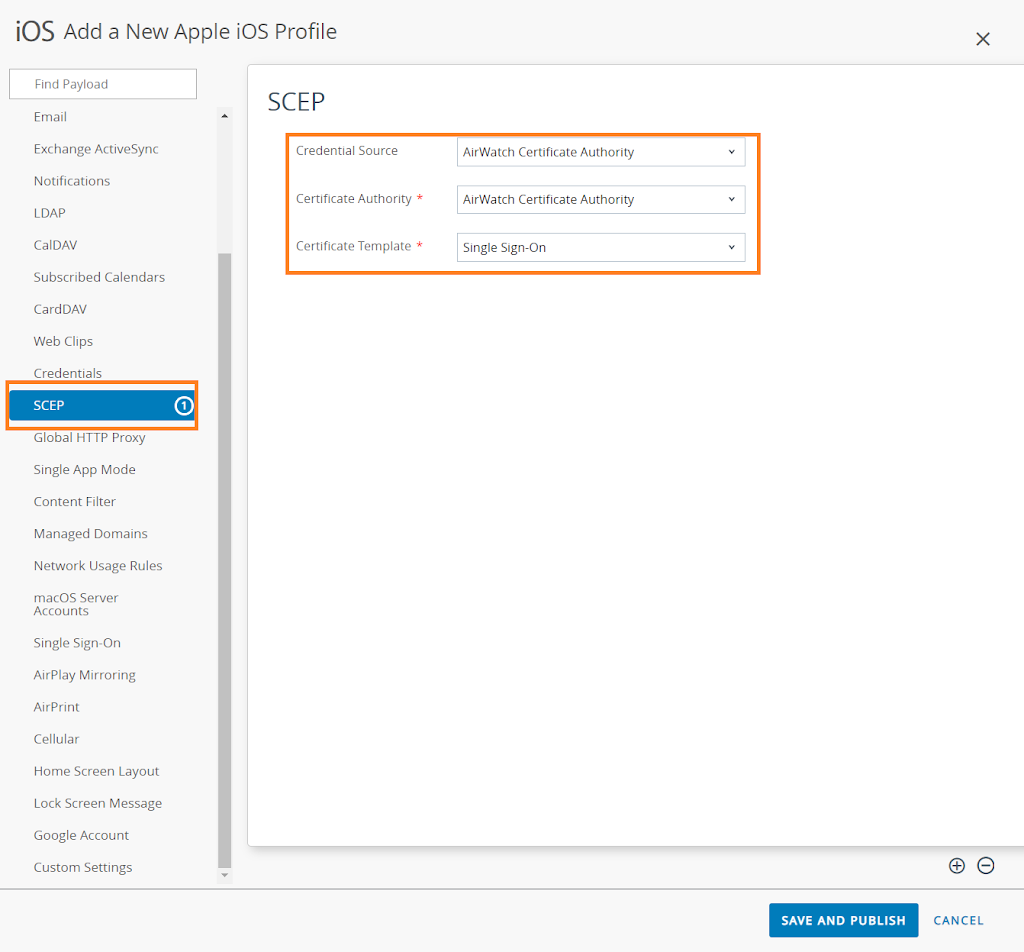
Scroll down to SCEP (Secure Certificate Enrollment Protocol) and click Configure.
In the settings area, select AirWatch Certificate Authority for both Credential Sources and Certificate Authority. Then in Certificate Template, select Single Sign-On.
For this post we’re going to use the built-in Airwatch Certificate Authority – it is possible to use your own On-Premises CA but that’s not covered here.
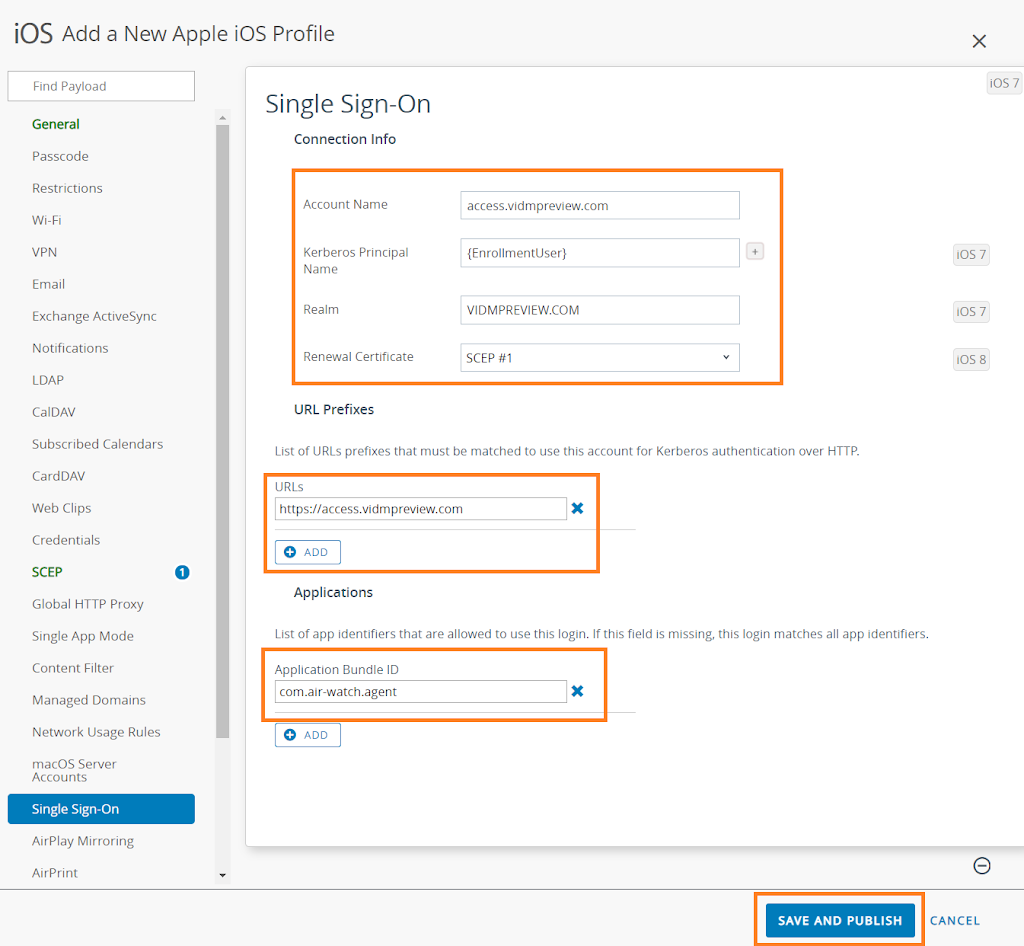
Don’t create a new Profile, but now scroll to Single Sign-On.
Fill out the values as per my example, replace them with those specific to your environment.
Account Name: This should just be your Workspace ONE Access tenant
Kerberos Principal Name: The {EnrollmentUser} infers a variable lookup value of the username of the enrolled user eg. jdoe
Realm: This is the Kerberos realm. This MUST be in capitals, and will match wherever your Access Tenant is hosted. For example we have vmwareidentity.com.au, vmwareidentity.asia, vmwareidentity.com (amongst others). You should change this to reflect where its hosted.
Renewal Certificate: In the dropdown, select SCEP#1 (or whatever is in there). This is telling the profile to use the SCEP payload (above).
URL Prefix: Where it will present the Kerberos ticket to. For the basics, just having your Workspace ONE Access URL is enough.
Applications: Lastly, this is the list of application bundle IDs that can access the Kerberos token. The example I have is the Workspace ONE Intelligent Hub Bundle ID. If for instance you wanted to do SSO into Microsoft Word you’d need to add the Bundle ID of Word for iOS here.
When you add the Applications to the Workspace ONE UEM Console, they actually show up in this list. If not, you can go into the Applications section of the Workpace ONE UEM Console and it shows in there. For native iOS Applications (eg. Safari) you can just search for them on the Internet.
Select Save and Publish for it to be sent to your devices based on the settings you put in the General section (Smart Group, Auto/Manual etc.)
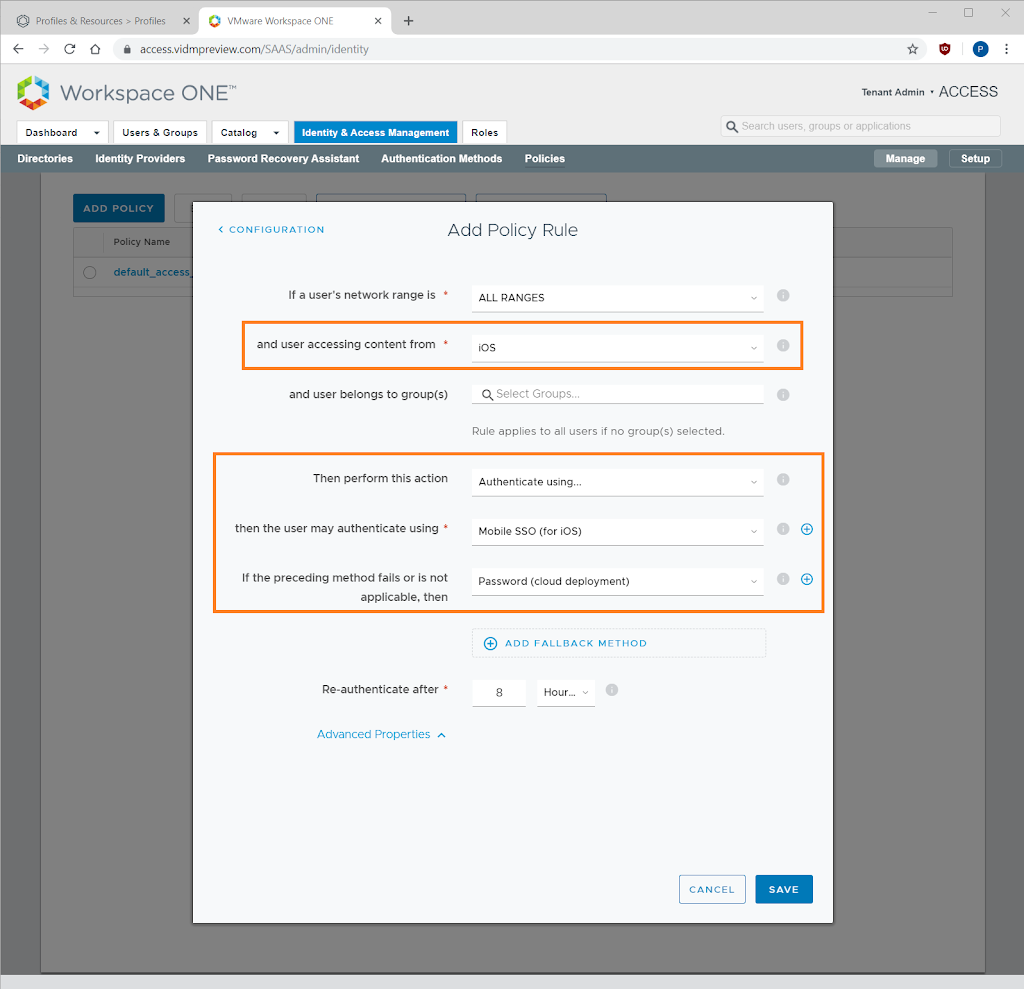
OK now so we have the device configured, we need to configure Workspace ONE Access to allow MobileSSO for iOS.
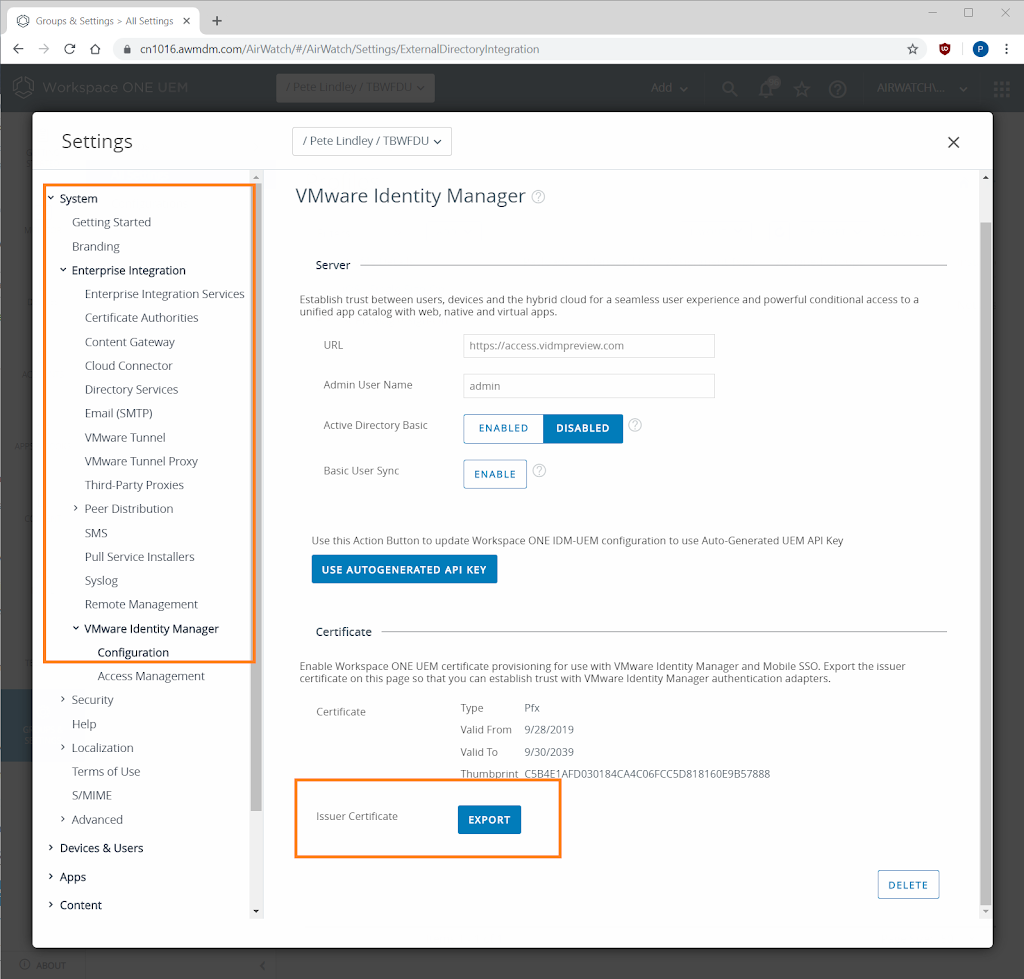
Before we leave the Workspace ONE UEM Console, go to Settings -> System -> Enterprise Integration -> VMware Identity Manager -> Configuration and Export the Issuer Certificate.
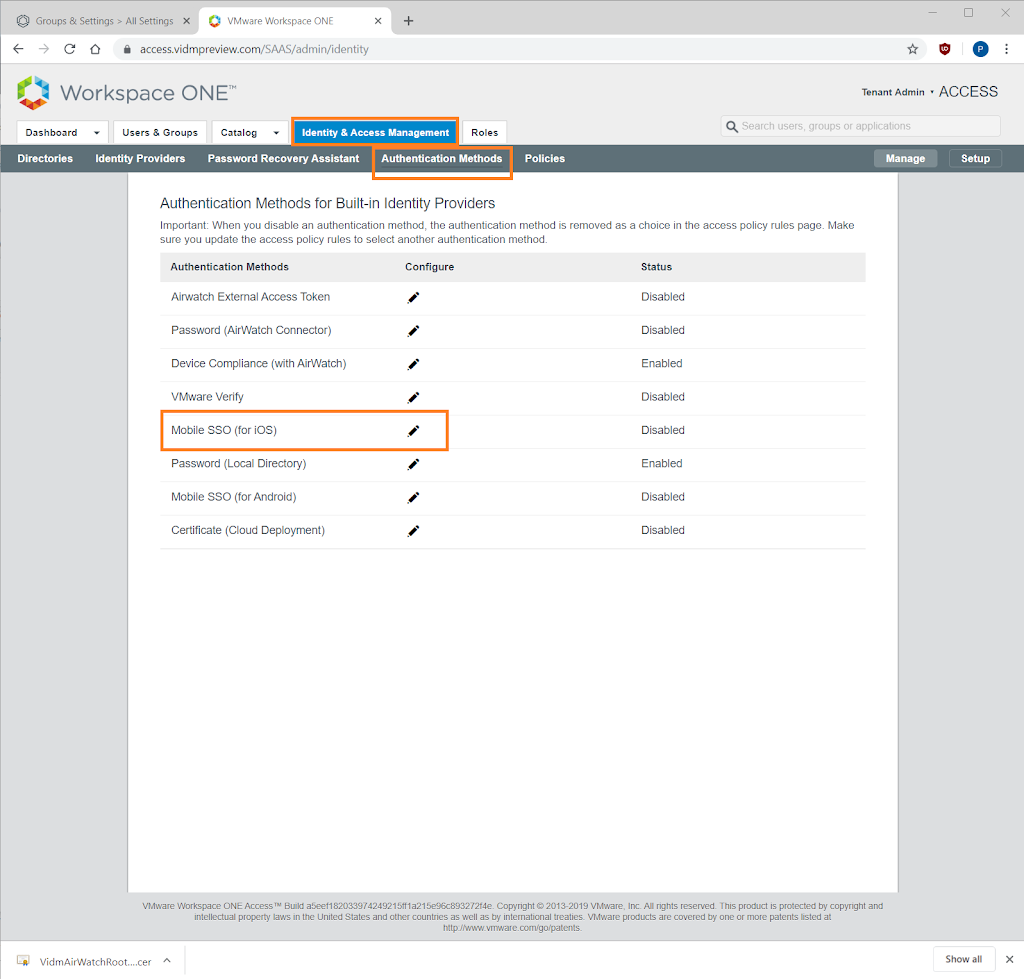
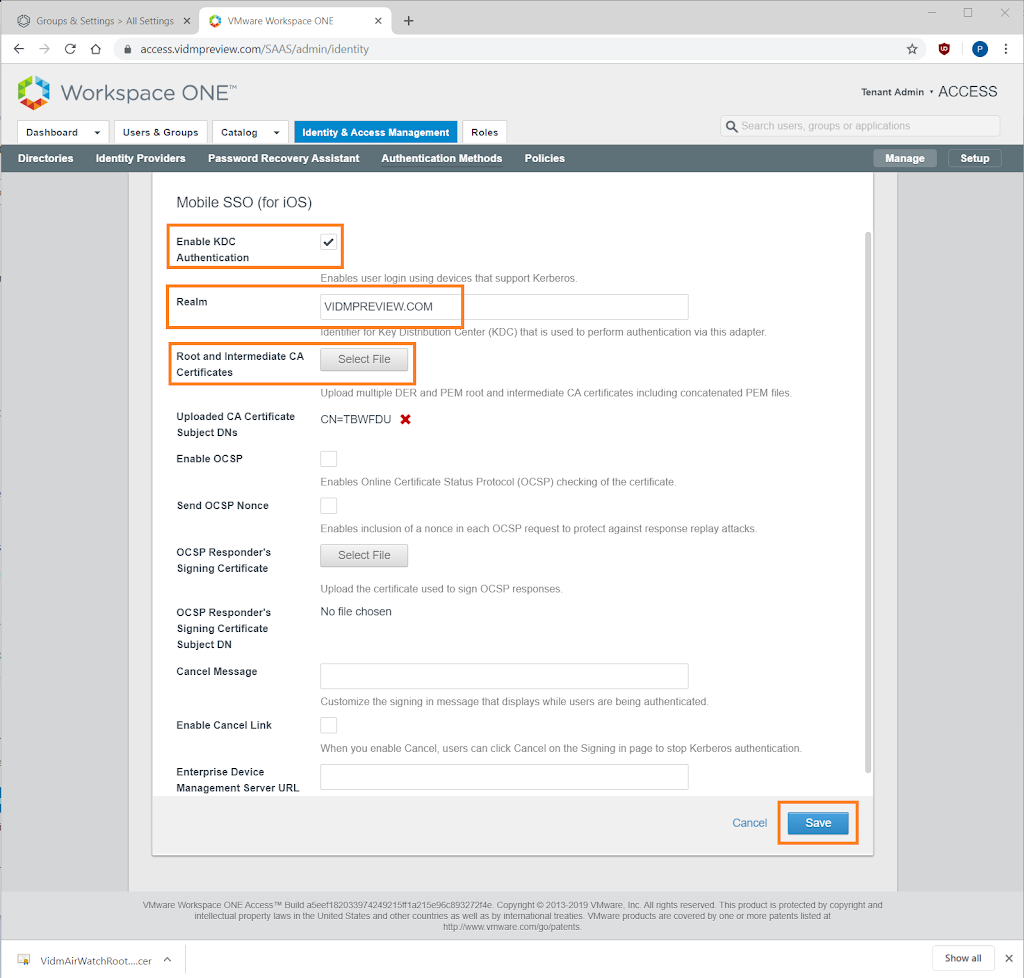
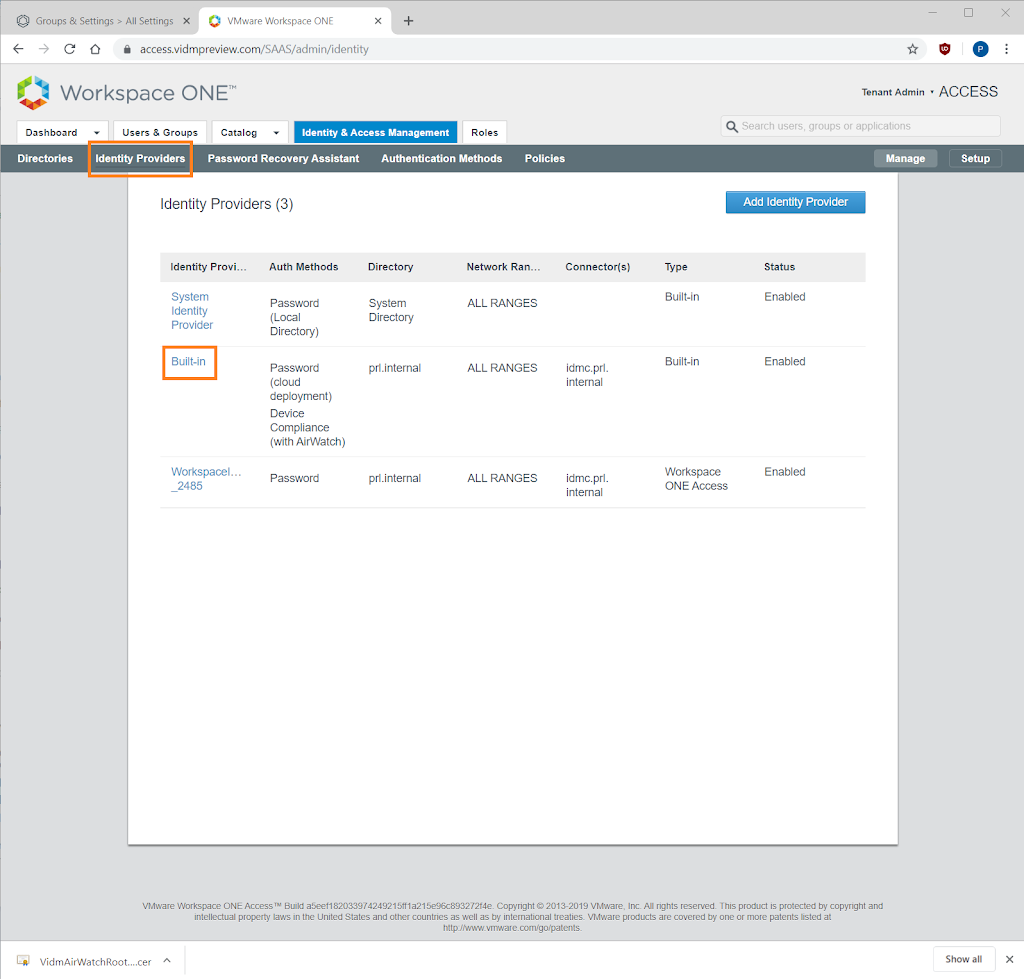
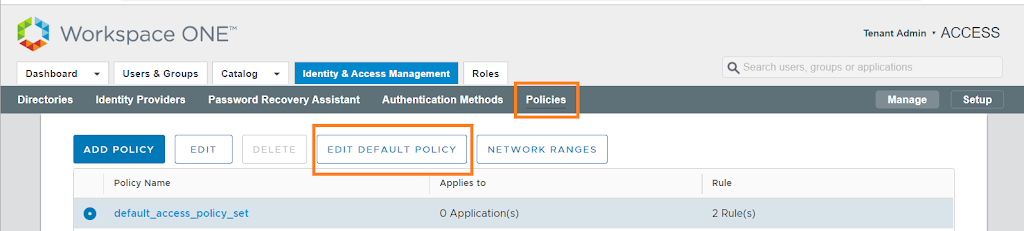
In your Workspace ONE Access Admin Console, go to Identity & Access Management -> Authentication Methods and click the pencil to configure the Mobile SSO (for iOS) Auth Method


Leave a Reply
You must be logged in to post a comment.