Installing Airwatch Cloud Connector and Configuring Directory Services in Workspace ONE UEM
by
pete
Welcome to the first installment to my end-to-end lab and Testdrive Sandbox configuration series.
In this post we’ll look at installing the Airwatch Cloud Connector (ACC) and integrating with your On-Premises Active Directory.
I do get asked this a bit as to why you would use the ACC and Active Directory if you’re using SAML authentication with either Identity Manager/AzureAD/Okta etc. Although in this article I won’t cover SAML integration I’ll point out why we still recommend full directory integration.
Firstly, it allows users to authenticate securely with their directory credentials. It also pre-populates all the required user metadata in the console (email address, UPN, immutableID, phone number etc.). Using SAML without directory integration would mean the user gets created in Workspace ONE UEM using SAML JIT therefore it won’t bring in the rest of those attributes. The other main reason we recommend using this is so that Administrators can use Active Directory groups for Assignment Groups in Workspace ONE UEM. As an example, you could assign a policy or application to your HR Department if that group exists in AD. If you don’t have these groups, you would need to manually go into the Workspace ONE Console and assign the configurations to those users one by one.
The ACC also facilitates integration with On-Premises Certificate Authorities, Syslog servers and SMTP services (amongst other things)
So, back to the actual configuration.
The first thing I’ll point out here is that we’re NOT going to use the wizard 🙂 how would be learn otherwise!
To get the ACC ready to install, we need go into Groups and Settings -> All Settings
Now we need to go System -> Enterprise Integration -> Cloud Connector
Depending on your environment, you may need to select Override. But you will need to Enable the Airwatch Cloud Connector and you should Enable Auto Update. This allows the ACC to upgrade itself when the Console gets upgraded.
Save your Config!
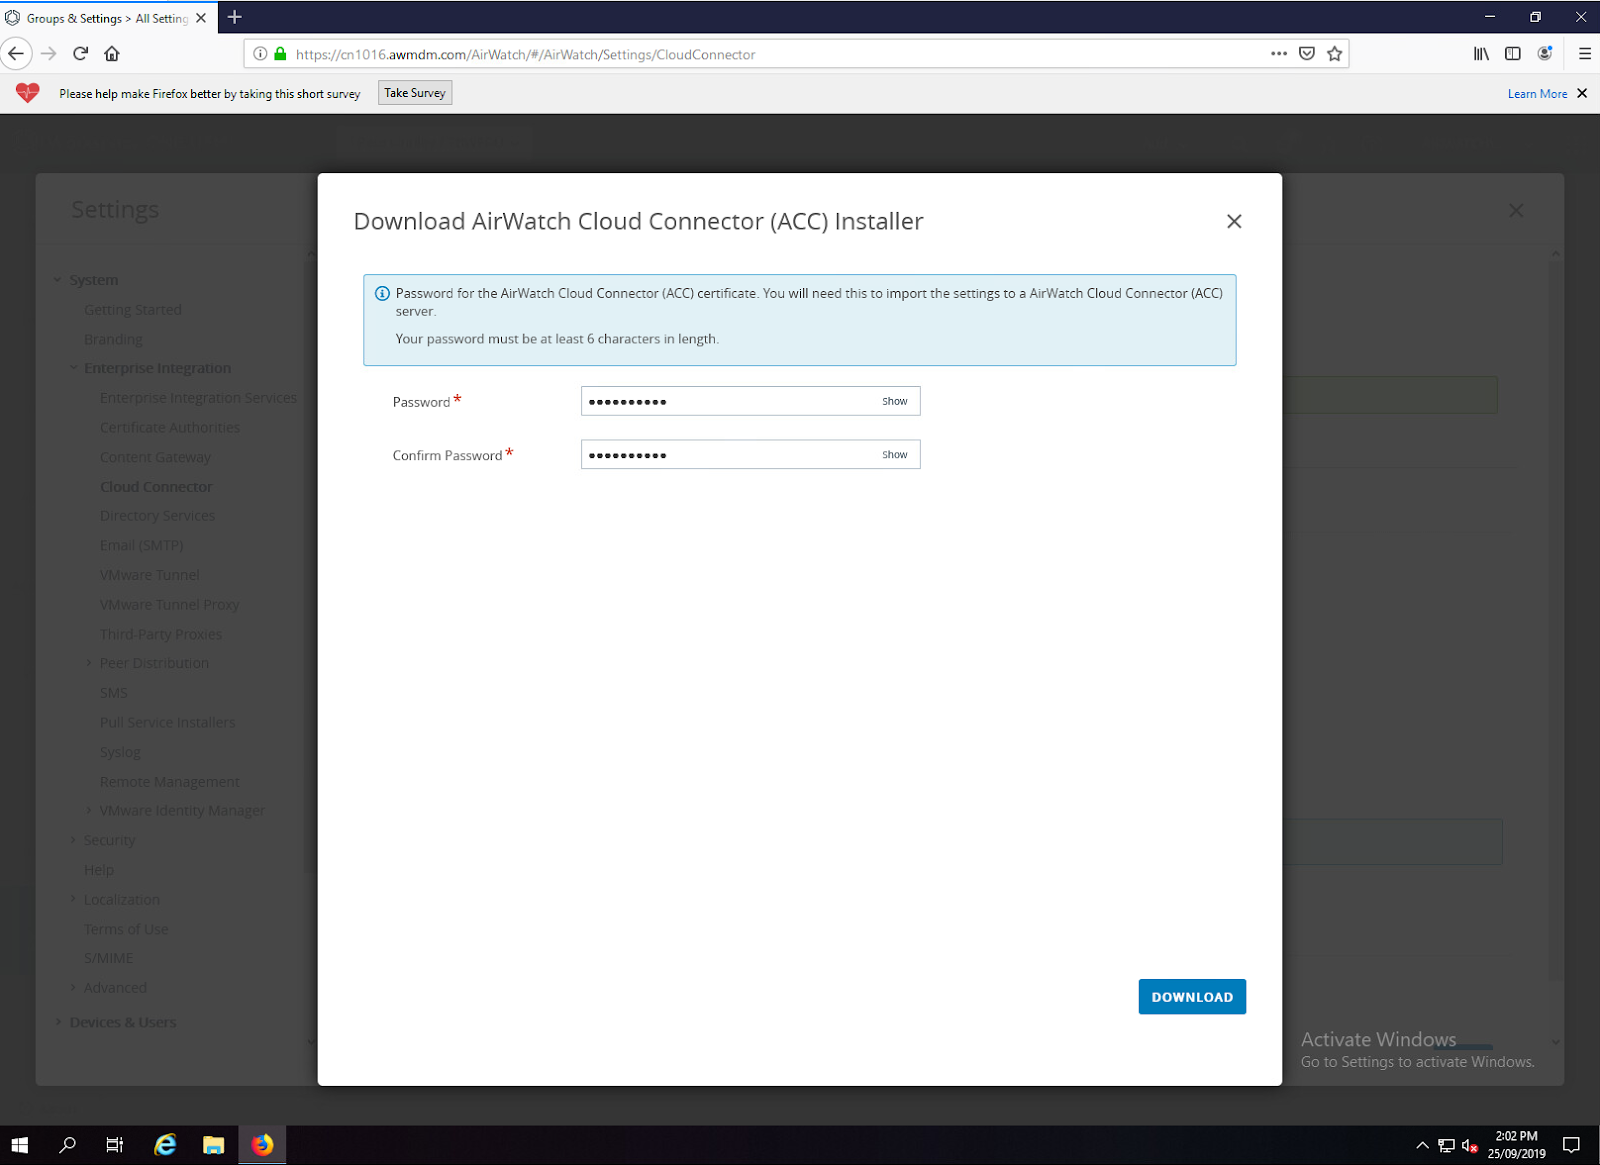
Now that you’ve saved this, you will see an option to Download Airwatch Cloud Connector Installer.
When you click on this, you are taken to a page where you enter a password. This password is used to secure the installer and the SSL certificate that is generated by the console. The SSL certificate here is used to securely communicate with the Workspace ONE UEM Environment. Enter any password – you’ll need it again shortly to install.
Download this installer on the Server you intend to install it on (if possible) or make it easily accessible.
Here’s a video of the installation process. Its really straight forward.
Now you have the ACC installed, you can go back to the Workspace ONE UEM Console and verify its communicating correctly. Click the Test Connection button and you should get a success message.
By default, all internal services will try to connect via the ACC. Click on the Advanced Tab (see above) and select what you need to connect to via the ACC.
My suggestion is to only select the Enterprise Services you know you’ll need. In this scenario I have a few others enabled, but the important one for this post is Directory Services.
Now our Workspace ONE UEM tenant can talk via the ACC to our Directory (Active Directory). We now need to configure the details.
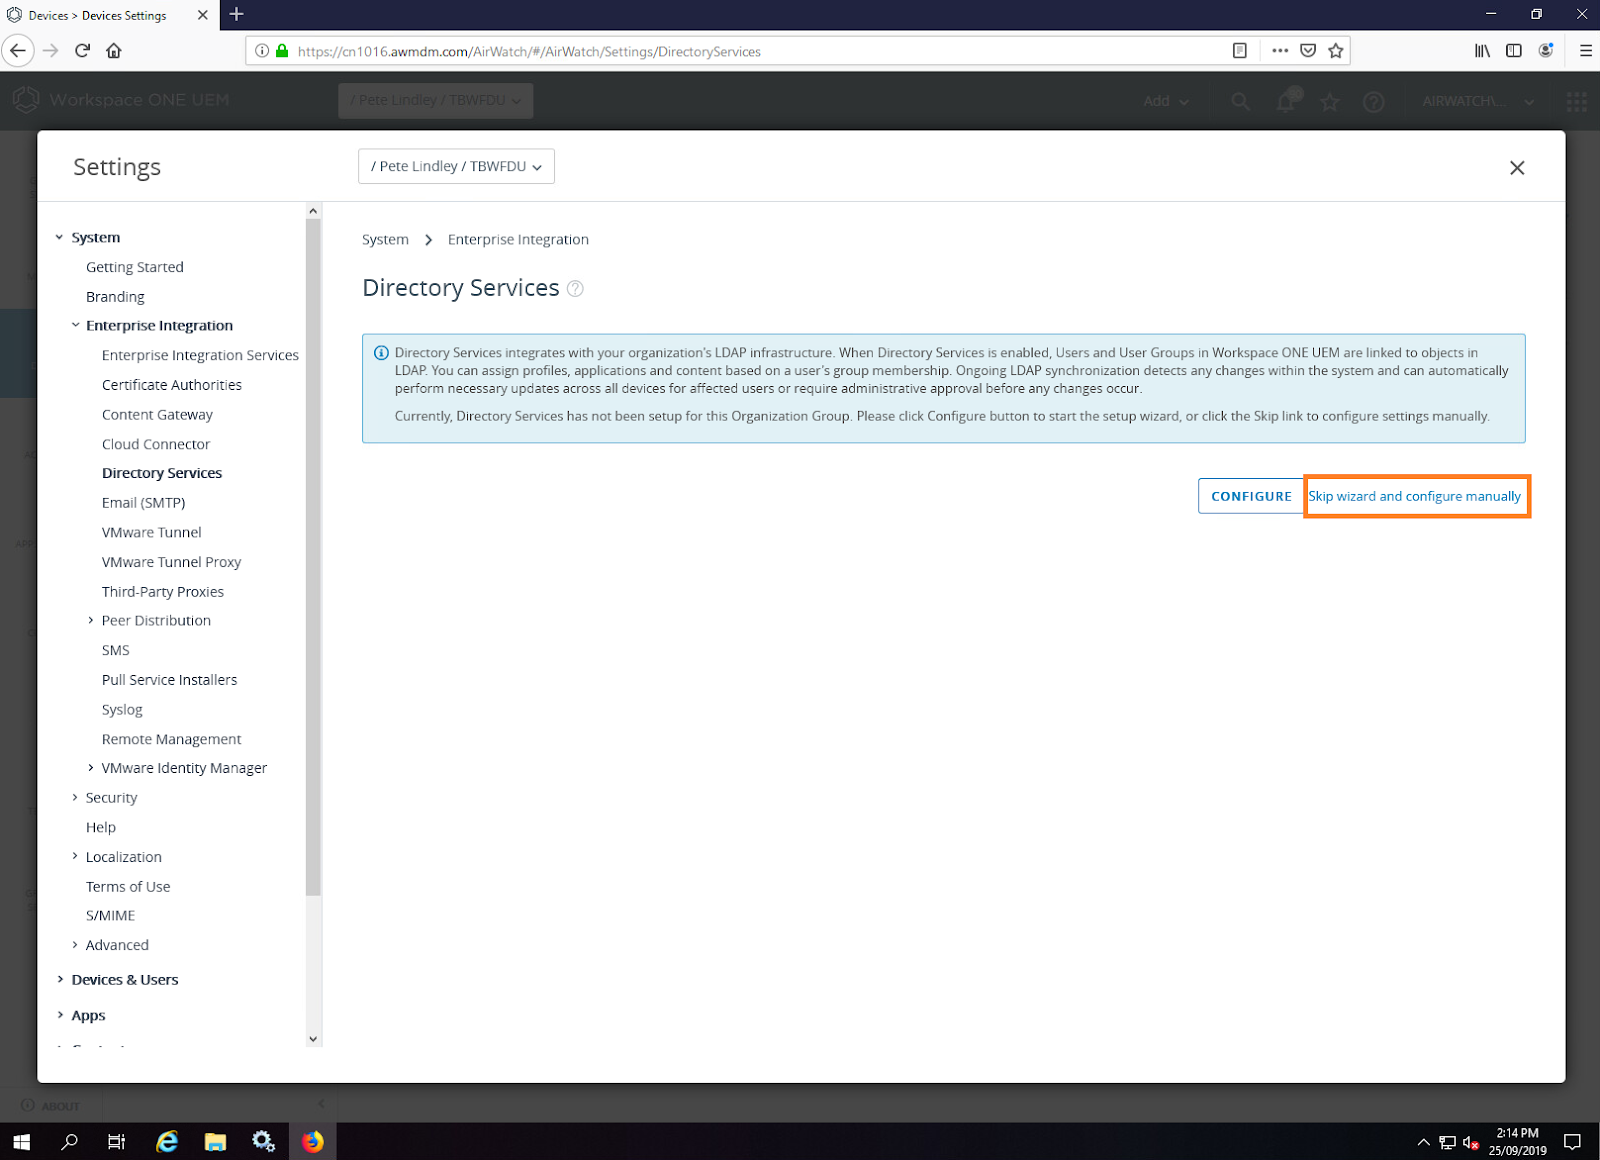
In the left hand side, go to System -> Enterprise Integration -> Directory Services
As I like to live on the edge, I’m going to skip the wizard.
Your environment may (probably will) be different to mine. Select your Directory Type and then fill in your Server details etc. You will also need a service account (basic user, no admin rights, password doesn’t expire) that you can use to do a Bind lookup. Enter this here too.
You’ll also need to scroll down and enter your server and Domain Controller name (if you don’t use DNS SRV). Press Save!
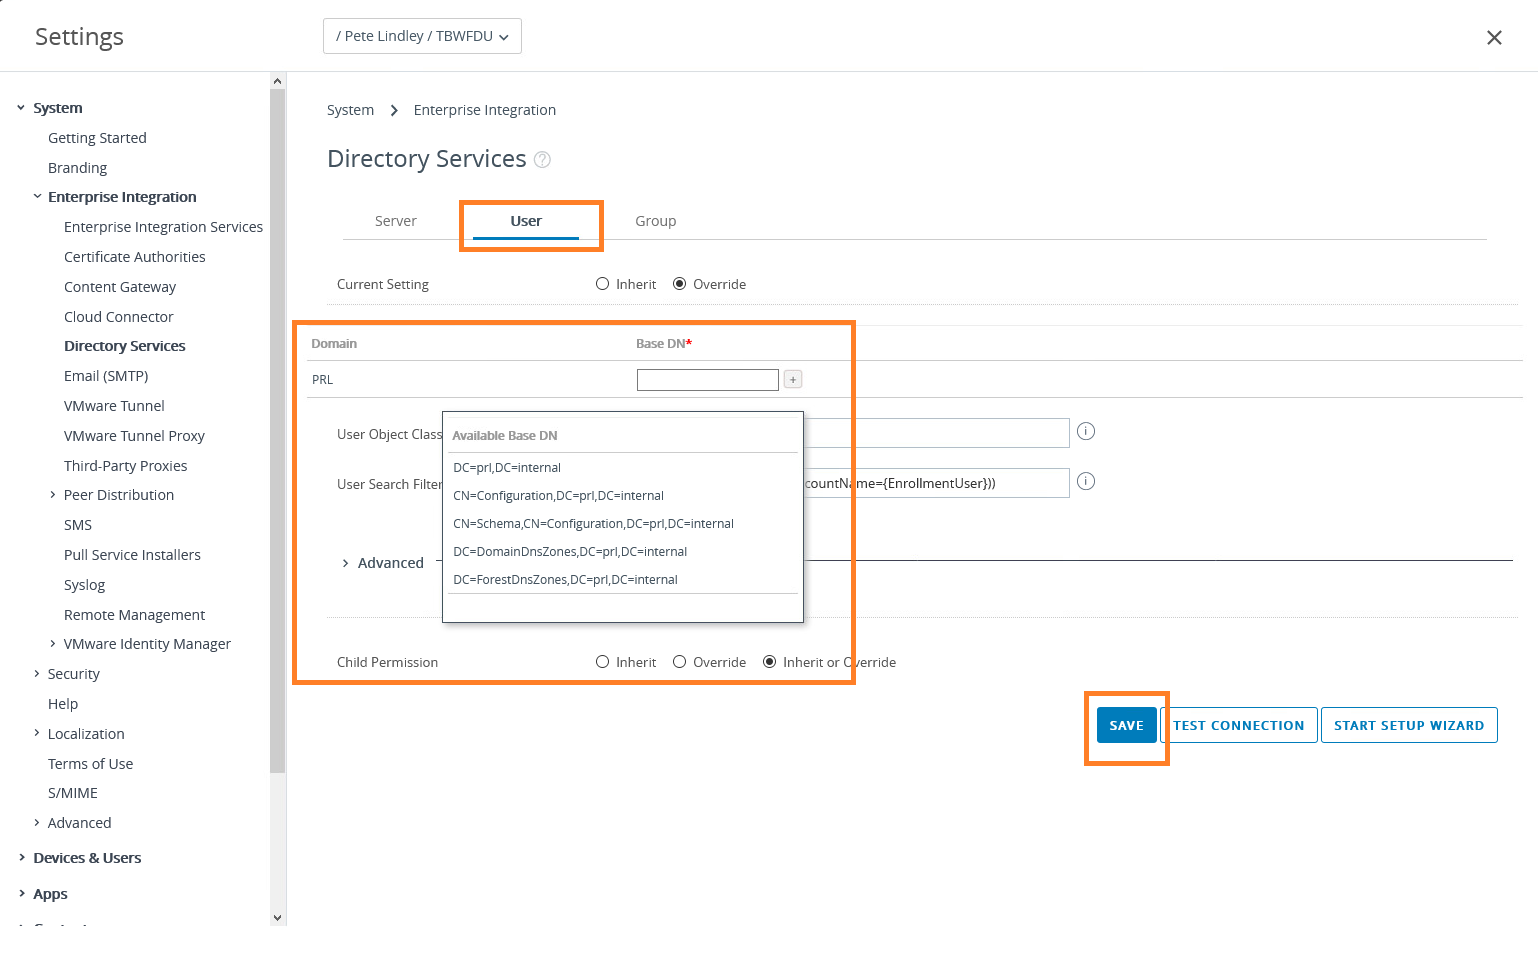
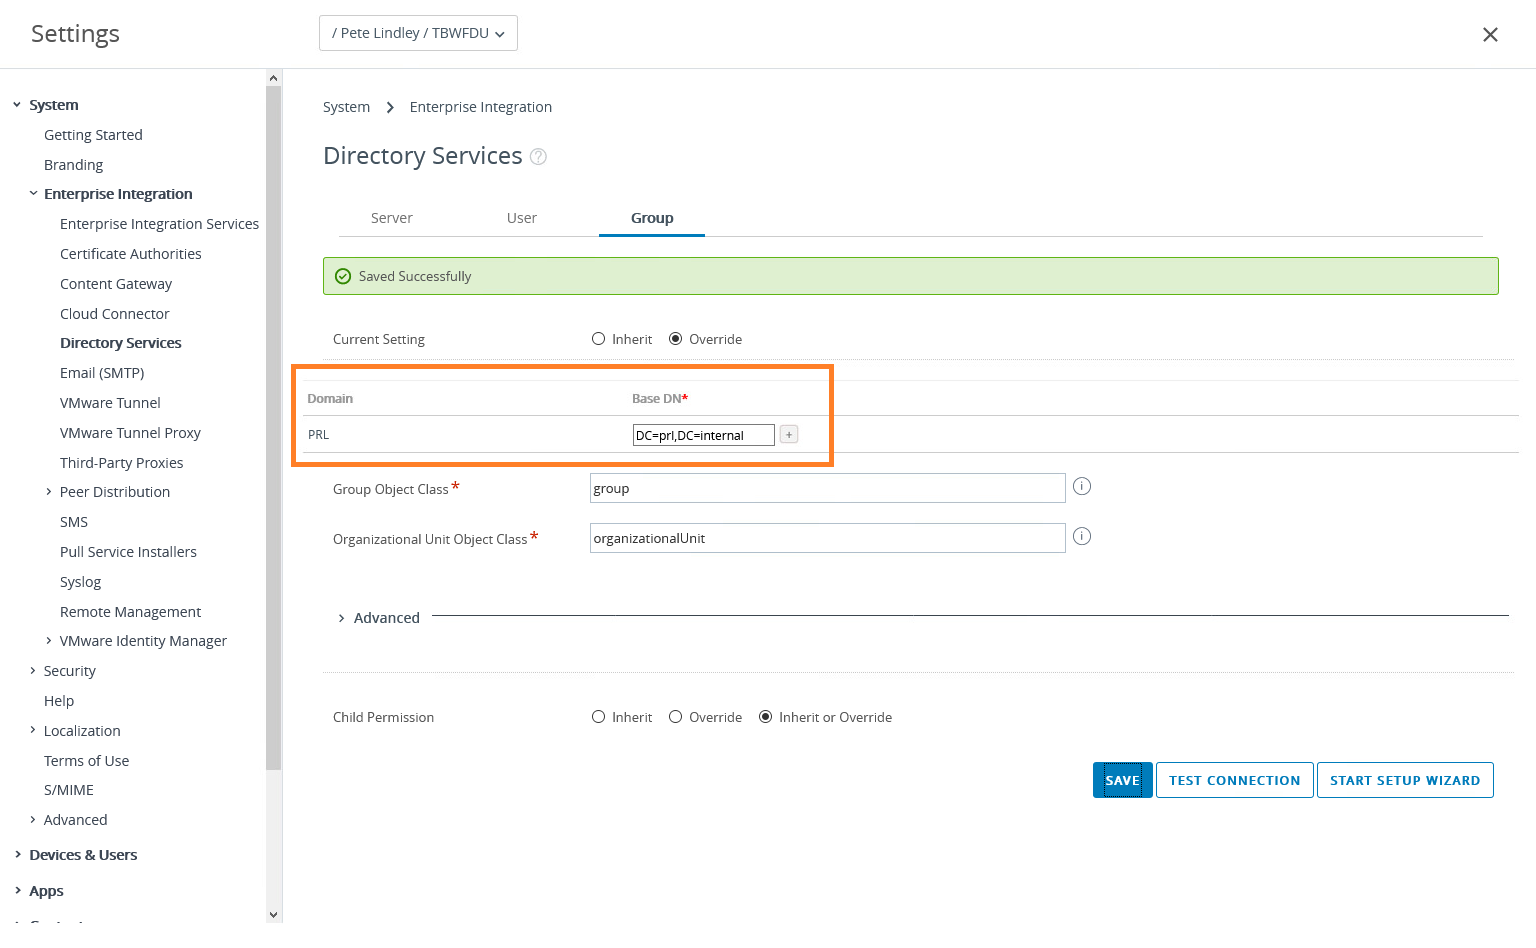
The last configuration step we need to do is configure the Base DN for searching for users and groups. Select the User tab, clear out anything that may exist in Base DN and the press the + button to view the available DN.
Do the same for Groups.
Now, if we press the Test Connection button we should be able to test that we can communicate to our directory and validate our Bind details are correct. We can also check that our Base DN are correctly set by looking up a user.
Given we’re all successful we can now add a Group to the Workspace ONE UEM Console.
Go to Accounts -> User Groups -> List View -> Add and select Add User Group
We can now search for a group, and add it to the Console ready to be used in Assignment Smart Groups.
That’s it – we have Workspace ONE UEM integrated with your Directory.
In the next article, I’ll cover the same integration for Workspace ONE Access (VMware Identity Manager).
If there’s something you think I’ve missed, please leave a comment below!
 Welcome to the first installment to my end-to-end lab and Testdrive Sandbox configuration series.


Leave a Reply
You must be logged in to post a comment.